How to Plant Ginger Root: Step-by-Step Growing Guide
Learn how to plant ginger root with our step-by-step growing guide. Grow fresh, flavorful ginger at home easily!
There's something incredibly satisfying about growing your own food, and ginger might just be one of the most rewarding crops you'll ever cultivate. That knobby, aromatic root you pick up at the grocery store? You can absolutely grow it yourself, and honestly, it's easier than most folks think.
Fresh homegrown ginger packs a punch that store-bought simply can't match. The flavor is brighter, the aroma more intense, and there's a certain pride that comes with harvesting something you nurtured from a humble piece of root. Plus, knowing exactly where your food comes from and how it was grown? That's priceless in today's world.
Whether you're a seasoned gardener looking to expand your repertoire or a complete newbie wanting to try something different, this guide has got you covered. Understanding how to plant ginger root with a step-by-step growing guide approach makes the whole process manageable and fun.
Ginger isn't fussy, but it does have preferences. Give it what it wants, and you'll be rewarded with beautiful tropical foliage and a bountiful harvest of spicy, aromatic rhizomes. Ignore its needs, and well, let's just say you'll learn some lessons the hard way. But don't worry! We're going to walk through everything together so you can avoid common pitfalls and set yourself up for success.
From selecting the perfect rhizome to harvesting your homegrown bounty, consider this your comprehensive roadmap to ginger growing glory. Shall we get started?
Why Growing Your Own Ginger Makes Total Sense
Before we dive into the how-to, let's talk about why growing ginger at home is such a brilliant idea. Spoiler alert: the reasons go way beyond just having fresh spice on hand.
The Flavor Factor
Store-bought ginger, while convenient, has often traveled thousands of miles and spent weeks in storage before reaching your kitchen. During this journey, it loses volatile oils and aromatic compounds that give ginger its characteristic zing. Freshly harvested homegrown ginger tastes completely different. It's juicier, more fragrant, and has a complexity of flavor that'll make you wonder why you ever settled for the supermarket stuff.
Cost Savings Over Time
A single piece of organic ginger at the store can run you several dollars. One planting of ginger, however, can yield pounds upon pounds of rhizomes. Once you've got your initial crop established, you can save pieces for replanting and essentially have a self-sustaining ginger supply. Talk about getting more bang for your buck!
Health Benefits at Your Fingertips
Ginger is renowned for its medicinal properties. From soothing upset stomachs to reducing inflammation, this root has been used in traditional medicine for centuries. Having fresh ginger readily available means you can brew healing teas, create natural remedies, or simply add a healthful boost to your daily meals whenever you please.
It's Just Plain Fun
Let's be real here. Watching those exotic-looking shoots emerge from the soil and unfurl into gorgeous tropical foliage is genuinely exciting. Ginger plants make beautiful houseplants or garden additions even before you consider the edible harvest. They bring a touch of the tropics to any growing space.
How to Plant Ginger Root: Step-by-Step Growing Guide Begins with Selection
The success of your ginger growing adventure starts before you even touch soil. Choosing the right rhizome is absolutely crucial, so let's nail this first step.
Finding Quality Ginger for Planting
You've got a couple of options when sourcing ginger for planting. Grocery store ginger works fine, though there's a catch. Commercial ginger is often treated with growth inhibitors to prevent sprouting on store shelves. While you can still use it, untreated organic ginger from natural food stores or farmers markets usually sprouts faster and more reliably.
For the best results, seek out seed ginger from garden suppliers or online specialty stores. This ginger is specifically intended for planting and hasn't been treated with anything that might slow it down.
What to Look For in a Planting Rhizome
Not all ginger pieces are created equal. When selecting your starter rhizome, keep these characteristics in mind:
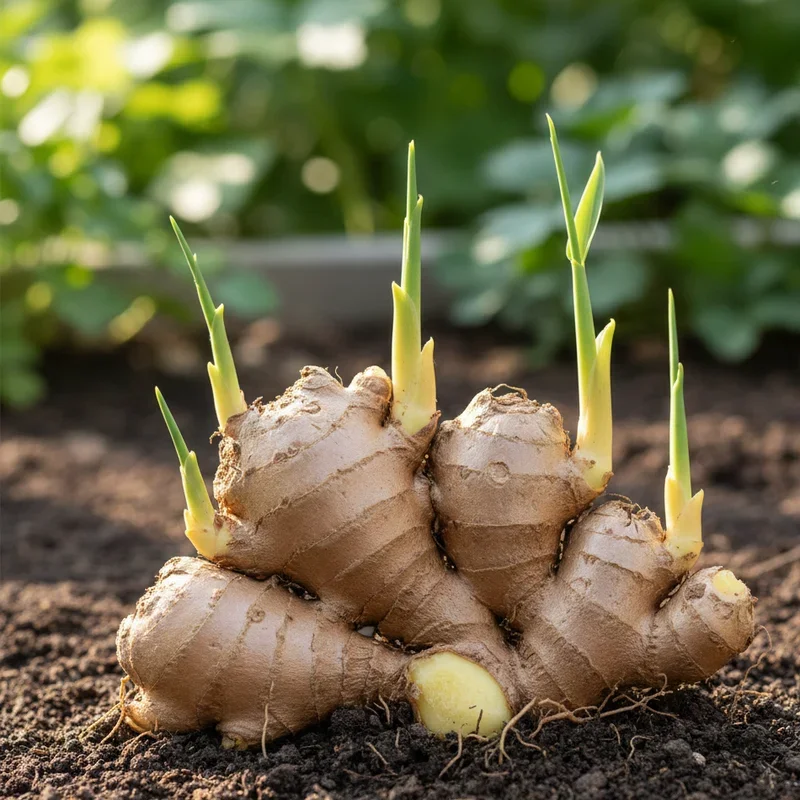
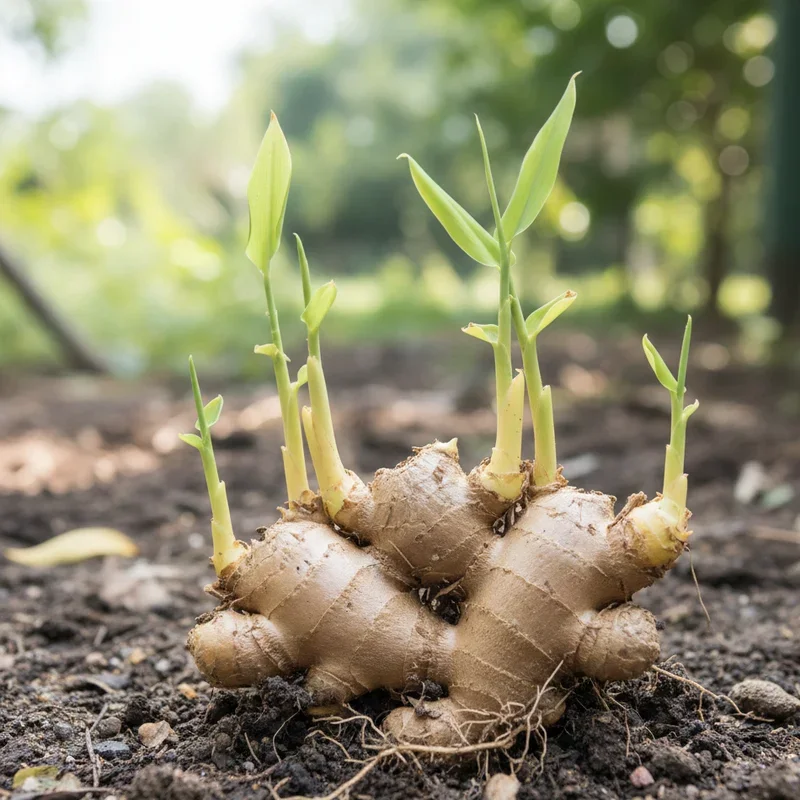
The rhizome should feel firm and plump, never wrinkled or dried out. Look for pieces that are at least 4 to 6 inches long with multiple bumps or knobs. These bumps, called eyes or growth buds, are where new shoots will emerge. The more eyes, the more potential shoots you'll get.
Avoid any rhizomes showing signs of mold, soft spots, or damage. Fresh ginger should have smooth, taut skin with a slight sheen. If it looks sad and tired, it probably won't have the energy reserves needed for vigorous growth.
Preparing Your Rhizome for Planting
Once you've got your ginger, a little pre-planting prep goes a long way. If you're using grocery store ginger, soaking it in warm water overnight can help wash away any growth inhibitors and wake up those dormant buds.
After soaking, let the rhizome dry for a day or two in a warm spot. This allows any cut surfaces to heal over and form a callus, which helps prevent rot once planted. Some growers like to pre-sprout their ginger by placing it in a warm, humid location until visible buds emerge. While not strictly necessary, it can speed things along.
Setting Up the Perfect Growing Environment
Ginger hails from tropical Southeast Asia, so it appreciates conditions that mimic its native habitat. Getting the environment right is half the battle.
Temperature Requirements
Here's the thing about ginger: it really doesn't like the cold. Temperatures below 50 degrees Fahrenheit can damage or kill the plant. Ideally, you want consistent warmth between 70 and 90 degrees for optimal growth.
This tropical preference makes ginger an excellent candidate for container growing, especially in cooler climates. You can start plants indoors or move containers inside when temperatures drop. In USDA zones 9 and above, ginger can grow outdoors year-round. Everyone else will need to get creative with indoor growing or treat it as an annual.
Light Conditions
Unlike many vegetables, ginger doesn't demand full sun. In fact, it prefers filtered light or partial shade, especially in hot climates. In its natural habitat, ginger grows beneath the forest canopy, so dappled sunlight suits it perfectly.
For indoor growing, an east-facing window works wonderfully. A spot that receives bright indirect light throughout the day is ideal. Avoid harsh afternoon sun, which can scorch the leaves and stress the plant.
Humidity Matters
Tropical plants love humidity, and ginger is no exception. Dry air can cause leaf tips to brown and overall growth to slow. Aim for humidity levels around 50 percent or higher if possible.
Misting your plants regularly helps, as does placing containers on pebble trays filled with water. Grouping plants together also creates a more humid microclimate. In dry winter months or arid climates, a small humidifier near your ginger can work wonders.
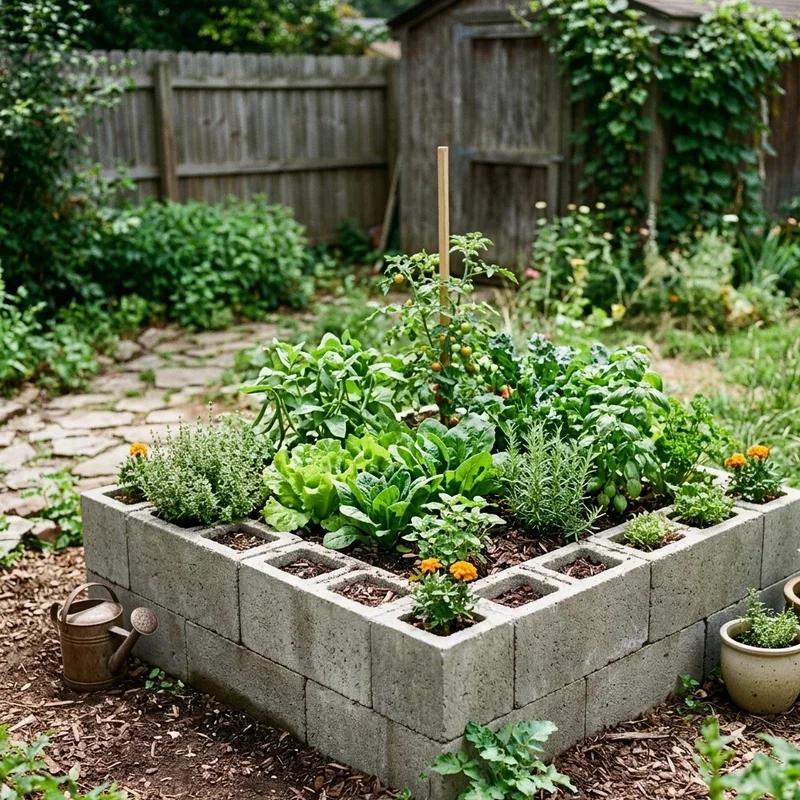
Soil and Container Selection for Thriving Ginger
Getting the growing medium right ensures your ginger has everything it needs to develop those plump, flavorful rhizomes.
The Ideal Soil Mix
Ginger craves rich, loose, well-draining soil. Heavy clay or compacted soil spells disaster since rhizomes need room to expand and will rot in waterlogged conditions. Think light and fluffy.
A mix of quality potting soil, compost, and perlite or sand works beautifully. The compost provides nutrients and organic matter while the perlite improves drainage and aeration. Aim for a slightly acidic to neutral pH between 5.5 and 6.5.
If you're planting directly in garden beds, amend heavy soils generously with compost and organic matter before planting. Raised beds offer excellent drainage control and make incorporating amendments easier.
Choosing the Right Container
Container growing is fantastic for ginger because it gives you complete control over conditions. When selecting a pot, go wide rather than deep. Ginger rhizomes spread horizontally, not vertically, so a shallow but spacious container makes more sense than a tall narrow one.
A container at least 12 inches wide and 12 inches deep accommodates a single rhizome nicely. For multiple pieces, go bigger. Make absolutely certain your container has adequate drainage holes. Sitting in soggy soil is the fastest way to kill ginger.
Plastic and glazed ceramic pots retain moisture well, which ginger appreciates. Unglazed terracotta dries out faster and may require more frequent watering, though it does provide excellent aeration.
How to Plant Ginger Root: Step-by-Step Growing Guide Planting Process
Alright, the moment you've been waiting for! Let's get that ginger in the ground.
Step One: Prepare Your Container or Bed
Fill your container with your prepared soil mix, leaving about two inches of space at the top for watering. Moisten the soil thoroughly but don't make it soggy. If planting in a garden bed, loosen the soil to a depth of about 8 inches and incorporate your amendments.
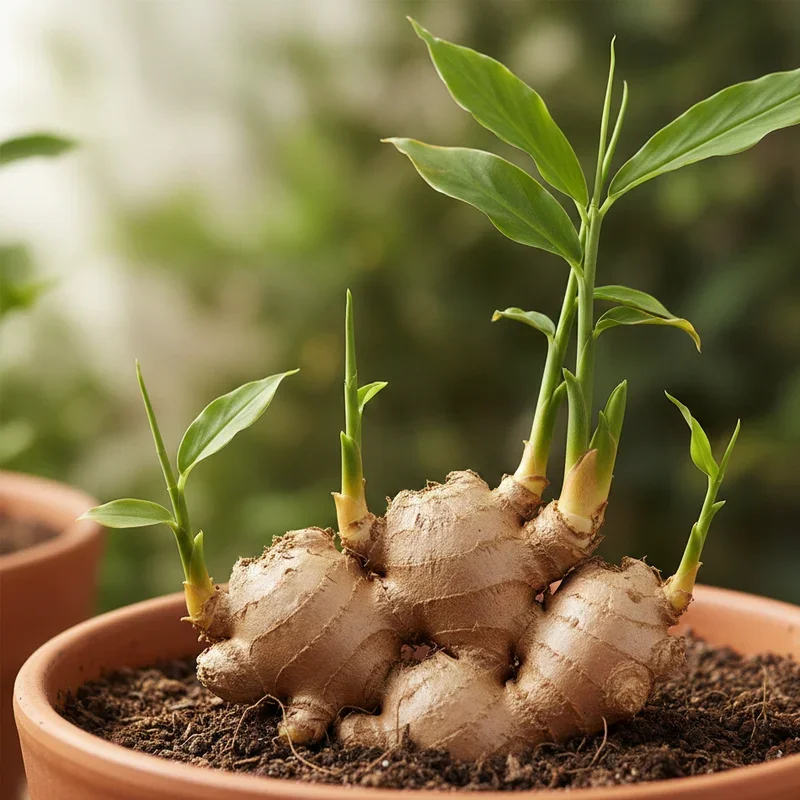
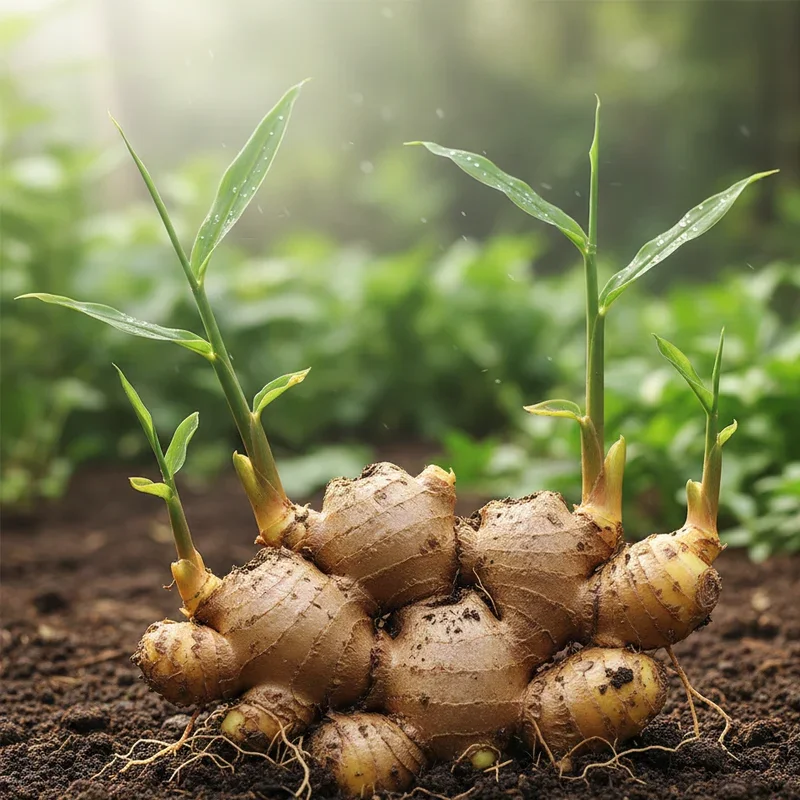
Step Two: Position the Rhizome
Place your ginger rhizome horizontally on the soil surface with the eyes pointing upward. If you're planting multiple pieces, space them about 8 inches apart to give rhizomes room to spread.
Step Three: Cover with Soil
Gently cover the rhizome with 1 to 2 inches of soil. Don't plant too deeply since shallow planting encourages better rhizome development. Pat the soil lightly to eliminate air pockets without compacting it.
Step Four: Water and Wait
Give your newly planted ginger a good drink, ensuring water drains freely from the bottom. Then, here comes the hard part, you wait. Ginger takes its sweet time emerging, sometimes up to several weeks. Keep the soil consistently moist but not waterlogged during this germination period.
Step Five: Celebrate Emergence
When you finally spot those first green shoots poking through the soil, do a little happy dance! Your ginger has officially started its journey. From here on out, it's all about ongoing care.
Caring for Your Growing Ginger Plant
Once established, ginger is fairly low-maintenance, but a little attention keeps it thriving.
Watering Wisdom
Ginger likes consistent moisture without being waterlogged. The goal is evenly moist soil that never completely dries out or becomes soggy. Stick your finger into the soil up to the first knuckle. If it feels dry, it's time to water.
During active growth in warm months, you'll water more frequently. When growth slows in cooler periods, reduce watering accordingly. Overwatering causes more ginger failures than underwatering, so when in doubt, hold off a day.
Feeding Your Ginger
Ginger is a moderately heavy feeder, especially during its active growing season. A balanced organic fertilizer applied monthly supports healthy foliage and rhizome development. Alternatively, top-dressing with compost every few weeks provides slow-release nutrients.
Avoid high-nitrogen fertilizers that promote leafy growth at the expense of rhizome development. You want a good balance that supports the whole plant.
Mulching Benefits
A layer of organic mulch over the soil surface helps retain moisture, regulate soil temperature, and suppress weeds. Straw, shredded leaves, or compost all work well. Just keep mulch from directly touching the stems to prevent rot issues.
Harvesting Your Homegrown Ginger
After months of patient care, harvest time finally arrives. This is what it's all been leading up to!
When to Harvest
Ginger typically needs 8 to 10 months to reach full maturity. However, you can harvest young ginger earlier, around 4 months, if you prefer a milder flavor and more tender texture. Young ginger is less fibrous and has thinner skin.
Signs that ginger is ready for harvest include yellowing leaves and stems dying back, usually as temperatures cool in fall. The plant essentially signals that it's done for the season.
How to Harvest
For partial harvests during the growing season, carefully dig around the edges of the plant and snap off what you need, leaving the main plant intact to continue growing. This works great for young ginger.
For full harvest, dump the entire container or dig up the whole plant. Gently brush away soil from the rhizomes, being careful not to damage them. Let them air dry for a few hours before storing.
Saving Pieces for Replanting
Always save your best, healthiest rhizomes for next season's planting. Choose plump pieces with visible eyes and store them in a cool, dry location until you're ready to start the cycle again.
Conclusion
Growing ginger at home is a rewarding journey that any gardener can successfully undertake. From selecting quality rhizomes to providing the warm, humid conditions this tropical plant craves, each step brings you closer to harvesting your own fresh, flavorful ginger. With patience and proper care, you'll enjoy not only a beautiful tropical plant but also a bountiful supply of homegrown spice that tastes worlds better than anything from the store. Your kitchen adventures will never be the same once you've experienced truly fresh ginger.
Read next: How to Plant and Maintain Healthy Shrubs
Frequently Asked Questions
1. How long does ginger take to grow from root to harvest?
Ginger typically requires 8 to 10 months for full maturity, though young ginger harvests are possible earlier.
2. Can I grow ginger indoors year-round?
Yes, ginger thrives indoors with adequate warmth, humidity, filtered light, and consistent moisture throughout the year.
3. Why isn't my planted ginger sprouting?
Cold temperatures, overwatering, or growth inhibitors on store-bought ginger commonly delay or prevent sprouting entirely.
4. Do ginger plants need direct sunlight to grow?
No, ginger prefers filtered light or partial shade and can actually suffer from intense direct sunlight.
5. Can I replant ginger from the grocery store?
Yes, though organic untreated ginger sprouts more reliably than conventional ginger treated with growth inhibitors.