How to Prune a Peach Tree for Best Growth
Discover expert techniques on how to prune a peach tree for best growth, increased fruit production, and overall tree health. Learn seasonal timing, essential tools, and step-by-step methods to transform your backyard orchard.

There's nothing quite like biting into a sun-warmed peach you've grown yourself, the juice dripping down your chin as you savor that perfect balance of sweetness and tang. But let's face it—achieving that picture-perfect harvest doesn't happen by accident! Behind every productive peach tree stands a gardener armed with pruning shears and know-how. I've spent years figuring out how to prune a peach tree for best growth, often learning the hard way (and boy, do I have the scratched arms to prove it).
Many folks shy away from pruning their peach trees, terrified they'll somehow kill their precious fruit producer with one misplaced cut. Others go at it like Edward Scissorhands on caffeine, snipping away without rhyme or reason. The truth? Proper peach tree pruning isn't rocket science, but it does require understanding what you're doing and why you're doing it. After all, these trees have evolved over millennia to grow a certain way—our job is to work with their natural tendencies while gently guiding them toward greater fruit production.
In this guide, I'll walk you through everything you need to know about pruning peach trees, from timing and tools to techniques that'll have your neighbors green with envy when they see your bountiful harvest. Whether you're nursing along a young sapling or trying to rejuvenate Grandma's decades-old tree, you're about to become a pruning pro. So grab your gloves and let's dig in!
Understanding Peach Tree Growth Habits
Before you make a single cut, you've gotta understand what makes peach trees tick. These aren't your run-of-the-mill shade trees—they have some quirky growth habits that directly impact how we should prune them.
The Unique Biology of Peach Trees
Unlike some fruit trees that can bear fruit on the same branches for many years, peach trees produce their fruit on second-year wood. Yep, you heard that right—those delicious peaches grow on branches that formed last year, not on brand-new growth and not on ancient limbs. This one biological fact is the cornerstone of how to prune a peach tree for best growth.
Peach trees naturally grow in an open-vase or goblet formation, with multiple main scaffolding branches extending upward and outward from the trunk. Left to their own devices, they'll eventually become too tall, with fruit production shifting to the unreachable upper branches. Meanwhile, the interior gets shaded out, and before you know it, you're looking at a beautiful tree with mediocre fruit production that requires a ladder and a prayer to harvest.
The Goals of Proper Peach Tree Pruning
When pruning peach trees, we're aiming to:
Create and maintain that open-center vase shape
Keep the tree at a manageable height (nobody wants to be balancing on the top rung of a ladder to pick fruit)
Encourage production of new fruiting wood each year
Remove dead, diseased, or problematic branches
Allow sunlight to penetrate throughout the canopy
Improve air circulation to reduce disease problems
Balance the tree's energy between growth and fruit production
By understanding these goals, you'll be able to make more confident decisions when standing before your tree, shears in hand, wondering "to cut or not to cut?"

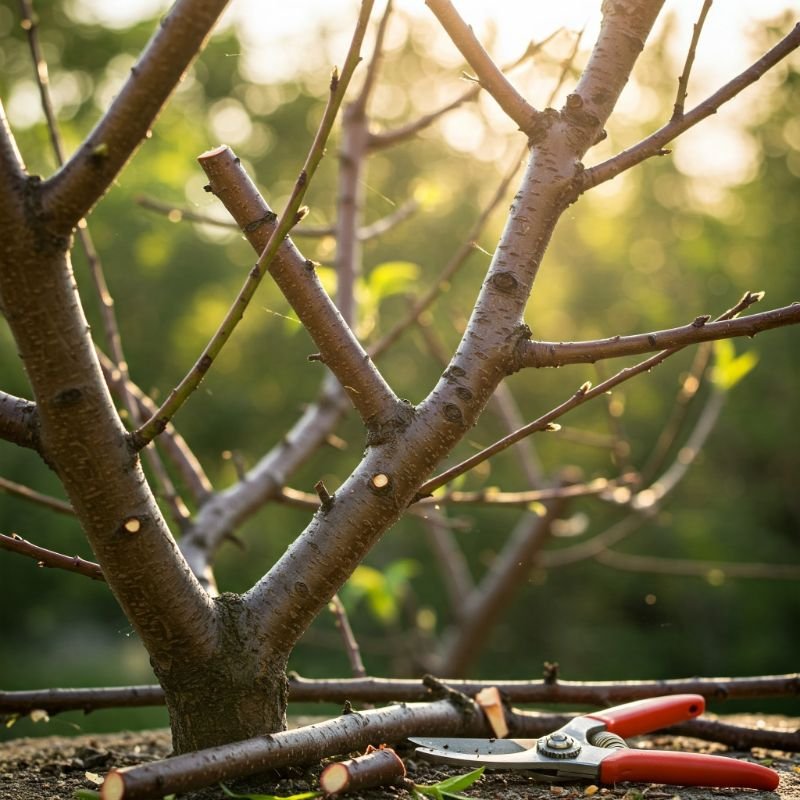
Essential Tools for Pruning Peach Trees
Having the right tools isn't just about making the job easier—it's about making clean cuts that heal properly. Here's what you'll need:
Basic Pruning Kit
Bypass pruning shears: For small branches up to ½ inch in diameter
Loppers: For medium branches ½-2 inches thick
Pruning saw: For larger limbs that the loppers can't handle
Pole pruner: For those high branches you can't reach (though ideally, we'll be keeping the tree short enough to prune from the ground or a small step stool)
Gloves: Trust me, peach branches can be surprisingly scratchy
Safety glasses: Especially when working overhead—nobody wants sawdust in their eyes
Disinfectant: Rubbing alcohol or a 10% bleach solution to clean tools between trees
Tool Care and Maintenance
Your tools will serve you better and last longer if you:
Clean them after each use, removing sap and debris
Disinfect between trees to prevent spreading diseases
Sharpen regularly—dull tools make jagged cuts that invite disease
Oil moving parts and metal surfaces to prevent rust
Store in a dry place
I learned the hard way that using rusty, dull pruners is like trying to perform surgery with a butter knife—messy, ineffective, and potentially harmful to your tree. A little tool TLC goes a long way!
When to Prune: Timing is Everything
Knowing when to prune is almost as important as knowing how. Prune at the wrong time, and you might accidentally remove all your fruit potential or leave your tree vulnerable to disease.
Dormant Season Pruning: The Main Event
The best time for major pruning is during late winter dormancy—typically February to early March in most peach-growing regions. The exact timing depends on your climate, but aim for that sweet spot when the harshest winter weather has passed but before the buds begin to swell and open.
Why this time? Several reasons:
The tree's structure is clearly visible without leaves
The tree is still dormant, so pruning wounds heal better
You can remove diseased wood before pathogens become active in spring
Dormant pruning stimulates vigorous spring growth
You can see and shape the overall structure more easily
A good rule of thumb: Prune your peach trees when the threat of sub-freezing temperatures has passed but before you see any pink in the flower buds.
Summer Pruning: The Touch-Up
While the main pruning happens during dormancy, a light summer pruning has its place too. In mid to late summer (typically July or August), you can:
Remove water sprouts (those vigorous vertical shoots)
Thin out excessive new growth that's shading the interior
Cut back overly vigorous branches that might unbalance the tree
Summer pruning should be minimal—think of it as a light haircut rather than a major restyling. The goal is to let more light into the canopy and remove problematic growth, not to reshape the entire tree.
What About Fall Pruning?
In a word: don't. Fall pruning is generally discouraged because:
It can stimulate new growth that won't have time to harden off before winter
Healing is slower in fall, leaving the tree more vulnerable to disease
The energy needed for healing could be better used preparing for winter dormancy
If you absolutely must remove broken or diseased branches in fall, do only what's necessary and save the major pruning for late winter.
How to Prune a Peach Tree for Best Growth: Step-by-Step Guide
Alright, now we're getting to the nitty-gritty! Here's a systematic approach to pruning your peach tree properly.
Step 1: Assess Your Tree
Before making a single cut, walk around your tree and study it from different angles. Look for:
Dead, diseased, or damaged wood
Crossing or rubbing branches
Watersprouts (vigorous vertical shoots)
Overall shape and structure
Previous years' pruning cuts and how the tree responded
This assessment gives you a game plan rather than just hacking away randomly.
Step 2: Remove the Three Ds: Dead, Damaged, and Diseased Wood
Start with the obvious problems:
Dead wood: Completely brown, brittle branches with no signs of life
Damaged wood: Broken, cracked, or mangled branches
Diseased wood: Branches showing cankers, oozing, or abnormal growth
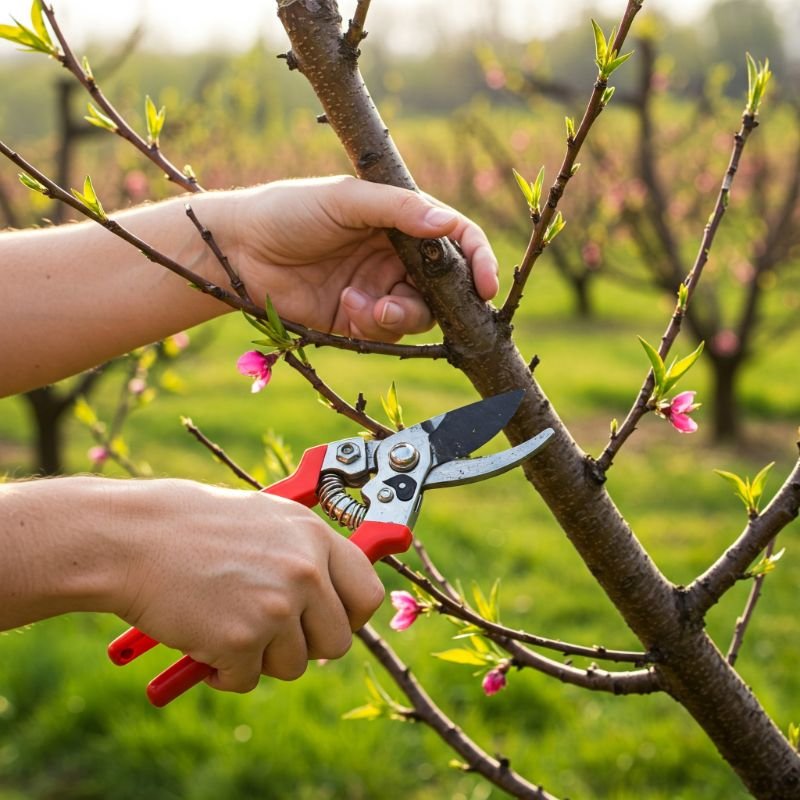
Make clean cuts at the branch collar (the slightly swollen area where the branch meets the trunk or larger branch). Don't leave stubs, but don't cut flush with the trunk either—that collar contains cells that help heal the wound.
Step 3: Establish or Maintain the Open-Center Form
If you're working with a young tree, now's the time to establish its basic structure. For mature trees, you'll be maintaining what you've already established.
For young trees (1-3 years old):
Select 3-5 main scaffold branches: These should be evenly spaced around the trunk, growing at roughly a 45-60 degree angle from the trunk.
Remove competing central leaders: Peach trees should not have a central vertical trunk extending to the top—cut this back to create the open vase shape.
Space scaffolds vertically: Ideally, main branches should be 6-8 inches apart vertically on the trunk.
For mature trees:
Maintain the open center: Remove any branches growing into the center of the tree.
Balance the scaffold branches: If one side is much heavier than the other, thin it out to balance the tree.
Step 4: Control Height and Spread
No one wants a 20-foot peach tree that requires a fire truck ladder to harvest, so:
Heading cuts on upward branches: Cut back branches growing straight up to an outward-facing bud or lateral branch.
Renewal cuts on old scaffolds: Cut back to younger, more vigorous side branches to keep the tree productive.
Reduce overall height: Don't be afraid to cut back the top by 25-30% on a too-tall tree. They can handle it!
Step 5: Thin Out the Canopy
Now it's time for detail work:
Remove crossing branches: When branches cross, they'll eventually rub and create wounds.
Eliminate narrow crotch angles: Branches that form a tight V-shape are structurally weak and prone to splitting.
Thin crowded areas: Remove some branches in densely packed areas, aiming to give each branch its own space.
Remove inward-growing branches: These defeat the purpose of the open-center form.
Step 6: Deal with Watersprouts and Suckers
Those vigorous vertical shoots stealing energy from your tree need to go:
Remove root suckers: These grow from the rootstock below the graft line and should be removed completely.
Eliminate watersprouts: These fast-growing vertical shoots crowd the canopy and rarely produce fruit.
Pruning Techniques for Different Tree Ages
Your approach should vary depending on the age of your tree:
Young Trees (Years 1-3): Establishing Structure
For brand-new trees, pruning is all about creating the right foundation:
First dormant season: Cut the newly planted tree back to about 30 inches high, just above a bud, to encourage branching.
Second dormant season: Select 3-5 main scaffold branches and remove competitors.
Third dormant season: Begin training secondary branches on the main scaffolds.
During these early years, you're essentially creating the tree's skeleton that will support future growth and fruit production. Be bold—these young trees respond vigorously to pruning.
Mature Trees (Years 4-8): Productive Management
Once your tree hits its stride:
Annual renewal: Remove about 40% of last year's growth to stimulate new fruiting wood.
Maintain height: Keep the tree at 8-10 feet for easy harvesting.
Thinning cuts: Focus on maintaining good light penetration throughout the canopy.
Older Trees (Years 9+): Rejuvenation
As trees age, they need more aggressive pruning to stay productive:
Major renewal cuts: Don't be afraid to cut larger branches back to younger wood.
Remove unproductive wood: Older branches with little new growth should be pruned out.
Consider a multi-year rejuvenation plan: For severely neglected trees, spread major pruning over 2-3 years.
Common Pruning Mistakes to Avoid
Even experienced gardeners make these errors sometimes. Knowing what NOT to do is just as important as knowing the right techniques.
Mistake #1: Removing Too Much at Once
The temptation to give a neglected tree a dramatic makeover is strong, but resist it! Never remove more than 30% of the tree in a single pruning session. Excessive pruning can:
Shock the tree
Stimulate too much vegetative growth at the expense of fruit production
Increase sunscald risk on suddenly exposed branches
Reduce yield for that season
For severely neglected trees, spread renovation pruning over 2-3 years.
Mistake #2: Making Flush Cuts
Cutting branches flush with the trunk removes the branch collar—that swollen area containing specialized cells that help heal wounds. Always cut just outside this collar, leaving it intact.
Mistake #3: Leaving Stubs
The opposite error is leaving long stubs when removing branches. These won't heal properly and can become entry points for disease and pests. Cut close to the collar, but not through it.
Mistake #4: Topping the Tree
Some folks try to control tree height by simply lopping off the top at an arbitrary height. This leads to a flush of weakly attached watersprouts and ruins the tree's natural structure. Instead, prune to outward-facing buds or lateral branches to maintain a better form while controlling height.
Mistake #5: Ignoring Tool Sanitation
Using dirty tools can spread disease between trees or even different parts of the same tree. Disinfect your tools regularly, especially after cutting diseased wood.
Advanced Techniques for Expert Growers
Ready to take your peach tree pruning to the next level? Here are some techniques used by commercial orchardists:
Bench Cuts for Scaffold Renewal
This technique involves cutting a main scaffold branch back to a well-placed side branch growing in a desirable direction. It's called a bench cut because the remaining stub resembles a bench. This preserves some of the branch structure while redirecting growth.
Detailed Fruit Wood Management
For maximum harvest quality:
Identify the best fruit wood: Look for pencil-thickness branches from last year with a reddish color.
Remove spent fruiting wood: Branches that fruited last year won't produce well again.
Space fruiting wood along scaffolds: Ideally, fruiting branches should be spaced about 8-10 inches apart.
Summer Training of New Shoots
During the growing season:
Pinch tips of vigorous new shoots: This encourages branching.
Spread branches with clothespins or weights: For branches growing too vertically, use spreaders to create better angles.
Rubbing off unwanted buds: Remove buds growing in undesired directions before they develop into branches requiring pruning.
Conclusion
Mastering how to prune a peach tree for best growth isn't just about making cuts—it's about understanding how these magnificent fruit trees grow and working with their natural tendencies. The confidence to make the right cuts comes with practice and observation, so don't be discouraged if your first attempts aren't perfect. Remember that peach trees are remarkably resilient and forgiving of pruning mistakes. By following the seasonal timing, using proper techniques, and avoiding common pitfalls outlined in this guide, you'll be well on your way to healthier trees, more manageable harvests, and those perfectly sun-ripened peaches that make all your efforts worthwhile.
Frequently Asked Questions
Q1: How much should I prune off my peach tree each year?
A: A good rule of thumb is to remove about 40% of the previous season's growth during dormant pruning. For a healthy, established tree, this typically means removing roughly 20-30% of the total canopy. However, the exact amount depends on the tree's age, vigor, and condition.
Q2: Will pruning affect my harvest this year?
A: Yes, but in a good way! While you're removing some potential fruiting wood, the pruning will direct the tree's energy to the remaining fruit, resulting in larger, better-quality peaches. Severely neglected trees might see reduced quantity the first year after heavy pruning, but improved quality and better production in subsequent years.
Q3: My tree has peach leaf curl disease. Does this change how I should prune?
A: Trees affected by peach leaf curl or other diseases benefit from slightly more aggressive pruning to improve air circulation. Remove more of the interior branches and be extra vigilant about cleaning your tools between cuts. Also, be sure to apply appropriate dormant sprays before bud break to control the disease.
Q4: Can I prune my peach tree in summer after harvest?
A: Light pruning after harvest is acceptable and can help maintain tree shape and allow better light penetration. However, save major structural pruning for the dormant season. Summer pruning should remove no more than 10% of the canopy.
Q5: How do I prune a peach tree that hasn't been pruned in years?
A: Approach renovation pruning as a multi-year project. In the first year, remove dead, diseased, and damaged wood, plus any branches growing toward the center. Reduce height if necessary, but don't remove more than 30% total. In subsequent years, continue refining the structure until you've restored an open-center form.