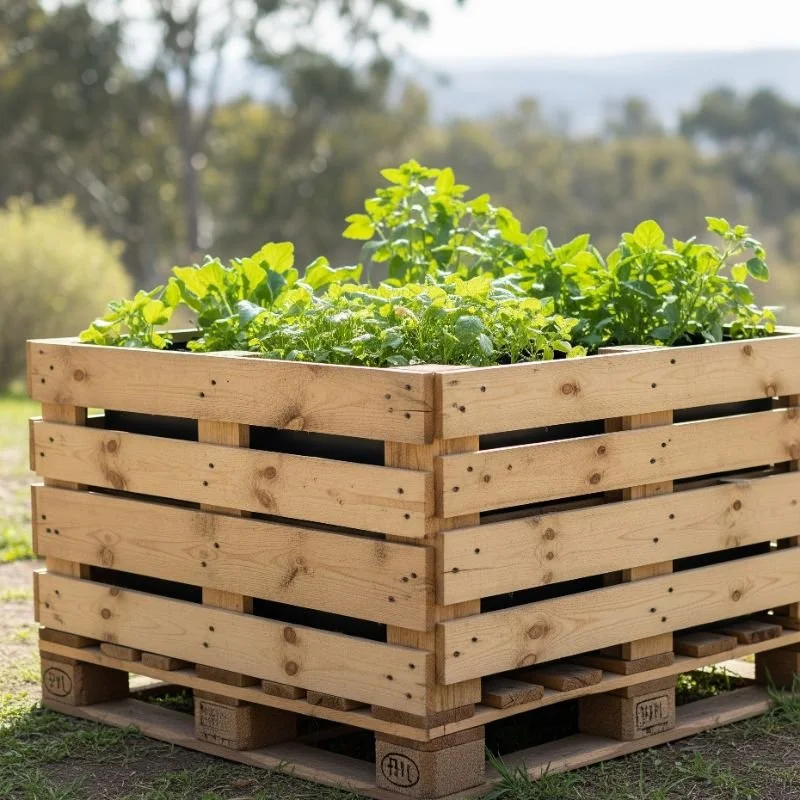
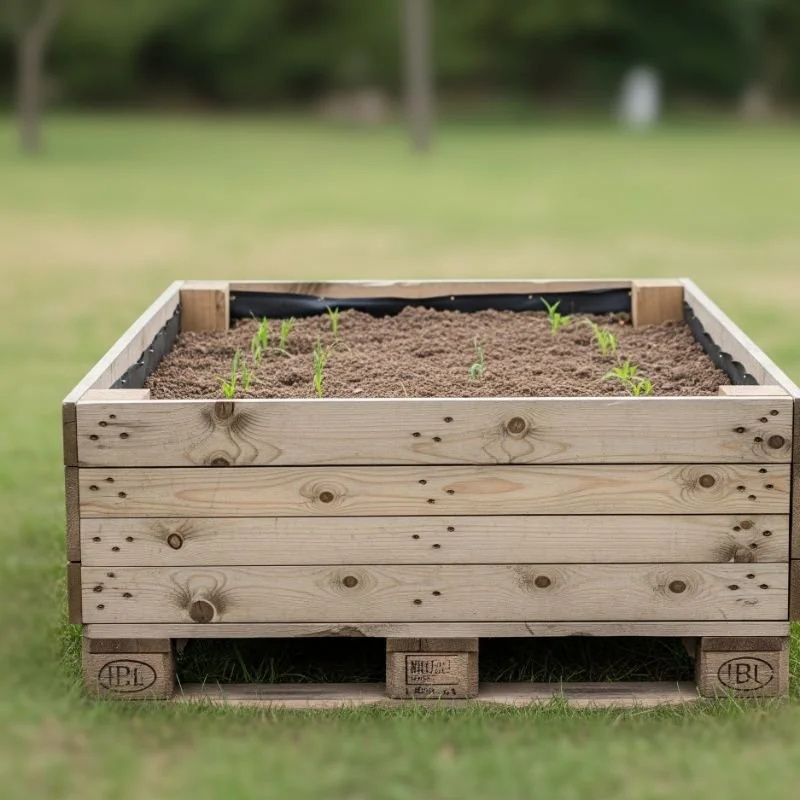
How to Build Raised Garden Beds From Pallets
Learn how to build raised garden beds from pallets with this step-by-step guide. Save money, recycle wood, and grow amazing vegetables today!

Ever looked at those wooden pallets stacked behind grocery stores and thought, "Hmm, I could do something with those"? Well, you're onto something! Building raised garden beds from pallets isn't just trendy; it's downright genius. You'll save a pretty penny, help Mother Earth by recycling, and end up with garden beds that'll make your neighbors green with envy (pun intended!).
Let's face it, traditional raised beds can cost an arm and a leg. But pallets? They're often free for the taking! Plus, there's something deeply satisfying about transforming what others see as junk into a productive garden space. Whether you're a seasoned gardener looking to expand your growing space or a newbie wanting to dip your toes into gardening waters, this guide's got you covered.
Why Choose Pallets for Your Raised Garden Beds?
The Budget-Friendly Factor
Holy moly, have you seen lumber prices lately? Building raised beds from scratch can empty your wallet faster than you can say "tomato." Pallets, on the other hand, are often available for free from local businesses. Many stores are actually happy to have someone haul them away!
Environmental Benefits Galore
By repurposing pallets, you're keeping wood out of landfills and giving it a second life. It's like being a superhero for the planet, cape optional! Plus, you're reducing demand for new lumber, which means fewer trees getting the axe.
Built to Last
Here's the kicker: pallets are designed to carry heavy loads. They're sturdy, weather-resistant (to a degree), and ready to handle whatever your garden throws at them. With proper treatment, they'll serve you well for years.
Finding the Right Pallets for Your Project
Where to Score Free Pallets
Looking for pallets? You've got options aplenty:
Local grocery stores and supermarkets
Garden centers and nurseries
Construction sites (always ask first!)
Small businesses and warehouses
Online marketplaces like Craigslist or Facebook Marketplace
Shipping and receiving departments
Choosing Safe Pallets
Not all pallets are created equal, folks! Here's what to look for:
Heat-treated pallets marked with "HT" stamp
Avoid chemically treated pallets marked "MB" (methyl bromide)
Skip painted pallets (could contain lead)
Choose sturdy pallets without broken boards
Look for hardwood pallets for extra durability
Pallet Inspection Checklist
Before hauling those pallets home, give 'em a good once-over:
Check for chemical stains or strong odors
Look for signs of rot or insect damage
Ensure boards are securely attached
Verify the treatment stamp
Test weight and sturdiness
Tools and Materials You'll Need
Essential Tools
Gathering your tools beforehand saves tons of time. Here's your shopping list:
Hammer or pallet buster
Circular saw or handsaw
Drill with screwdriver bits
Measuring tape
Level
Safety glasses and gloves
Sandpaper or electric sander
Wire brush
Additional Materials
Besides pallets, you'll want:
Wood screws (2.5 to 3 inches)
Landscape fabric or cardboard
Quality potting soil and compost
Wood stain or sealant (optional)
Corner brackets for extra support
Gravel for drainage (if needed)
Step-by-Step Guide: How to Build Raised Garden Beds From Pallets
Step 1: Disassemble Your Pallets
Taking apart pallets can be a workout, but boy, is it worth it! Start by flipping the pallet upside down. Using your pallet buster or hammer, gently pry the boards from the support blocks. Take your time; rushing leads to split wood and frustration.
Pro tip: Spray stubborn nails with WD-40 and let it sit for a few minutes. Makes removal a breeze!
Step 2: Clean and Prepare the Wood
Once you've got your boards free, it's cleanup time. Use your wire brush to remove dirt, debris, and any loose wood fibers. Sand down rough edges to avoid splinters later. If you're feeling fancy, now's the time to apply wood stain or sealant for extra protection.
Step 3: Design Your Raised Bed
Here's where creativity kicks in! Decide on your bed dimensions. Popular sizes include:
4x4 feet for square beds
4x8 feet for rectangular beds
3x6 feet for smaller spaces
Remember, you'll want to reach the center without stepping into the bed. Keep width under 4 feet for easy access.
Step 4: Cut Boards to Size
Measure twice, cut once! That old carpenter's saying will save you headaches. Cut your pallet boards to match your desired dimensions. You'll need boards for all four sides, so plan accordingly.
Step 5: Assemble the Frame
Time to put it all together! Start by creating a rectangle with your cut boards. Use corner brackets for added stability, then secure everything with wood screws. Check that corners are square using your level.
Building tip: Pre-drill holes to prevent wood splitting, especially near board ends.
Step 6: Prepare the Location
Clear your chosen spot of grass and weeds. Level the ground as much as possible. Some folks add a gravel base for drainage, but it's not always necessary. Depends on your soil type and rainfall amounts.
Step 7: Install Your Raised Bed
Place your assembled frame in position. Use your level to ensure it's sitting evenly. If needed, dig out high spots or add soil to low areas. A level bed means even water distribution later.
Step 8: Add Bottom Barrier
Line the bottom with landscape fabric or cardboard. This helps suppress weeds while allowing drainage. Overlap edges by several inches for complete coverage.
Step 9: Fill With Growing Medium
Here comes the fun part! Fill your bed with a mix of:
1/3 topsoil
1/3 compost
1/3 peat moss or coconut coir
Mix well and fill to about an inch below the top edge. The soil will settle over time.
Creative Design Ideas for Pallet Garden Beds
Tiered Garden Beds
Why stick to one level? Stack pallet frames to create tiered beds. Perfect for herbs, strawberries, or cascading flowers. Just ensure each tier is slightly smaller than the one below.
U-Shaped Gardens
Create a U-shaped design for maximum planting space with easy access. Great for folks with mobility concerns since you can reach everything from the pathways.
Vertical Pallet Gardens
Standing pallets upright against a fence or wall creates instant vertical growing space. Ideal for small yards or patios!
Planting in Your New Pallet Garden Beds
Best Crops for Raised Beds
Your new beds are perfect for:
Tomatoes and peppers
Leafy greens like lettuce and spinach
Root vegetables (carrots, radishes, beets)
Herbs galore
Strawberries and bush beans
Annual flowers for pollinators
Companion Planting Tips
Make the most of your space with companion planting:
Tomatoes love basil neighbors
Carrots and onions are best buds
Marigolds repel many pests
Beans fix nitrogen for other plants
Maintaining Your Pallet Garden Beds
Regular Upkeep
Keep your beds productive with these maintenance tips:
Add compost annually to replenish nutrients
Check for loose boards and tighten as needed
Apply wood preservative every few years
Replace damaged boards promptly
Monitor for pest issues
Seasonal Care
Spring: Add fresh compost and mulch Summer: Ensure adequate watering Fall: Plant cover crops or add leaves Winter: Cover with straw in cold climates
Common Mistakes to Avoid
Using Treated Pallets
Never, ever use chemically treated pallets for food gardens. That MB stamp means methyl bromide, and trust me, you don't want that near your veggies!
Overcrowding Plants
It's tempting to squeeze in just one more tomato plant, but overcrowding leads to disease and poor yields. Follow spacing guidelines on seed packets.
Neglecting Drainage
Without proper drainage, your beds become swamps. Ensure your location allows water to escape, not pool.

Troubleshooting Common Issues
Wood Rot Problems
Noticed soft spots in your wood? Act fast! Replace affected boards and improve drainage. Consider raising beds slightly off the ground.
Pest Prevention
Slugs and snails love raised beds. Combat them with:
Copper tape around bed edges
Diatomaceous earth barriers
Beer traps (they can't resist!)
Hand-picking at dawn or dusk
Cost Comparison: Pallets vs. Traditional Materials
Let's talk numbers! Building a 4x8 raised bed:
New lumber: $75-150
Cedar boards: $200-300
Composite materials: $300-400
Pallets: $0-20 (for screws and sealant)
The savings are real, folks!
Safety Considerations When Working With Pallets
Protective Gear is Non-Negotiable
Always wear:
Safety glasses (flying wood chips are no joke)
Work gloves (splinters hurt!)
Closed-toe shoes
Dust mask when sanding
Proper Lifting Techniques
Pallets are heavier than they look. Bend those knees, not your back! Get help for the really heavy ones.
Advanced Tips for Experienced Gardeners
Double-Digging Method
Before installing beds, double-dig the soil beneath for improved drainage and root penetration. Your deep-rooted crops will thank you!
Hugelkultur Integration
Layer rotting logs at the bottom of your beds before adding soil. As wood decomposes, it feeds your plants and improves water retention.
Succession Planting Strategies
Maximize yields by planting new crops as others finish. Lettuce followed by beans followed by fall broccoli keeps beds productive year-round.
How to Build Raised Garden Beds From Pallets: Seasonal Considerations
Spring Setup
Spring's the perfect time to build your pallet beds. Soil's workable, weather's mild, and you're eager to plant. Plus, businesses often have excess pallets from winter shipments.
Summer Modifications
Hot weather means your beds need extra mulch to retain moisture. Consider adding drip irrigation for consistent watering.
Fall Preparation
As growing season winds down, it's maintenance time. Check for wear and tear, add compost, and plant garlic for next year's harvest.
Winter Protection
In cold climates, your beds need TLC. Add protective mulch, cover with row covers, or plant winter-hardy crops like kale.
Conclusion
Building raised garden beds from pallets combines creativity, sustainability, and practicality into one rewarding project. You've learned the ins and outs of selecting, preparing, and transforming discarded pallets into productive growing spaces. With some elbow grease and these guidelines, you'll create garden beds that not only save money but also contribute to a greener planet. So grab those free pallets, roll up your sleeves, and get ready to grow the garden of your dreams!
Read next: 15 Stone Raised Garden Bed Ideas for Lush Gardens
Frequently Asked Questions
1. How long do pallet garden beds typically last?
With proper care, expect 5-7 years of productive growing seasons.
2. Can I paint my pallet garden beds?
Yes, use non-toxic, exterior paint or natural wood stain only.
3. What size pallets work best for garden beds?
Standard 48x40 inch pallets provide plenty of usable lumber.
4. Is it safe to grow vegetables in pallet wood?
Absolutely, if you choose heat-treated, chemical-free pallets only.
5. How deep should raised pallet beds be?
Aim for 6-12 inches minimum; deeper for root vegetables.