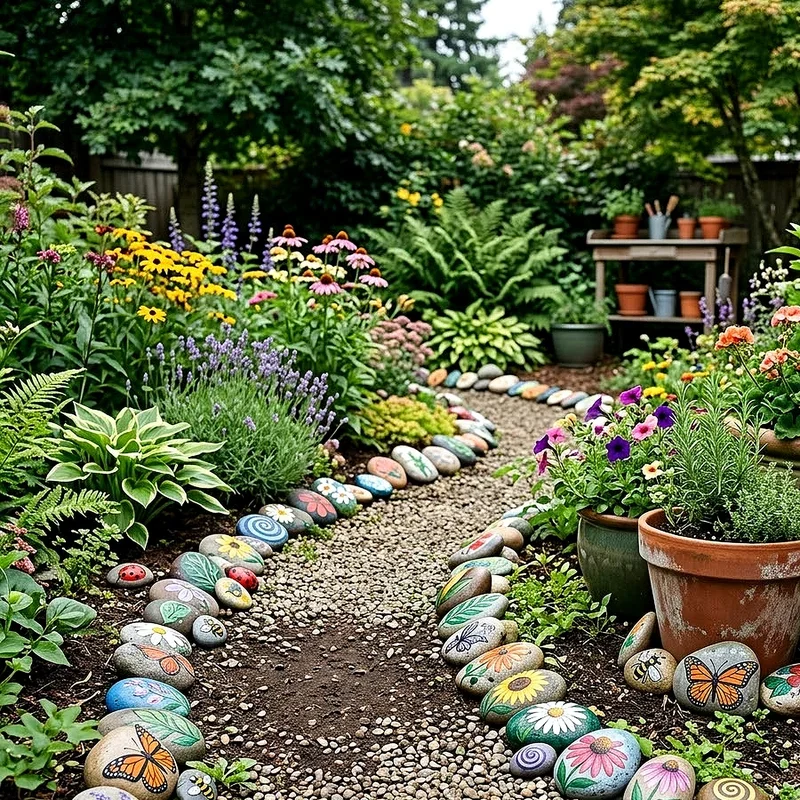
Discover 15 painted rock ideas for garden paths and planters, from ladybug markers to glowing stones, with easy tips that keep colors bright.
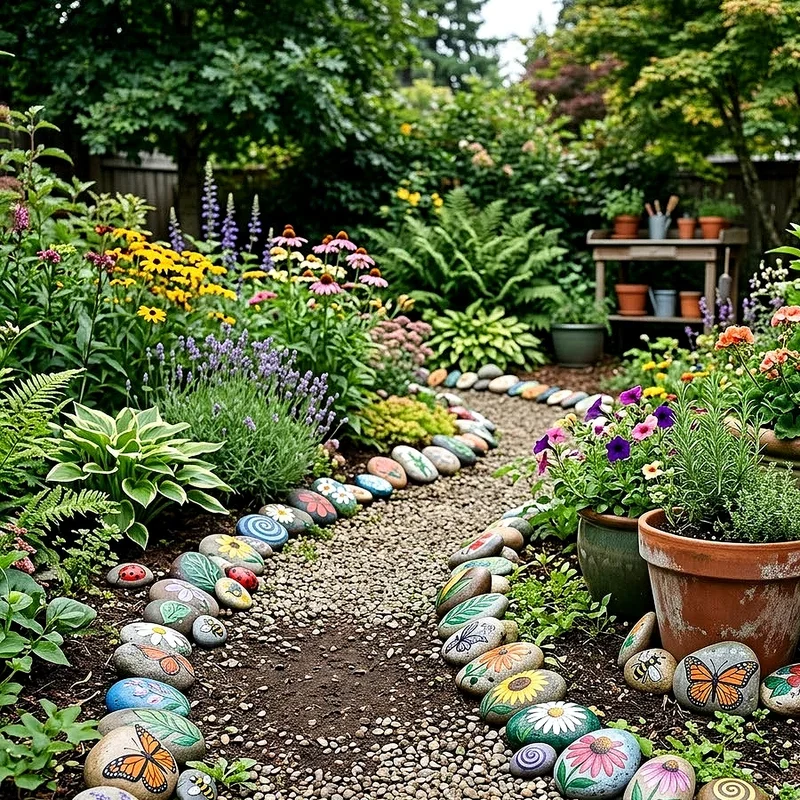
I still remember the first rock I ever painted. It was lumpy, the paint went on streaky, and my ladybug looked more like a confused tomato. I set it next to the front step anyway, and my neighbor asked about it within a week. That is the strange power of a painted stone. It costs almost nothing, takes an hour on a slow afternoon, and somehow it changes how people walk through your yard. Gardens are full of green and brown, which is lovely but predictable. A splash of color sitting low to the ground works like punctuation in a long sentence. It makes you pause. So if your path feels a little plain, or your planters look bare between blooms, grab a bucket and start collecting. Here are fifteen ideas worth trying this weekend.
1. Ladybug Stepping Stones That Lead the Way
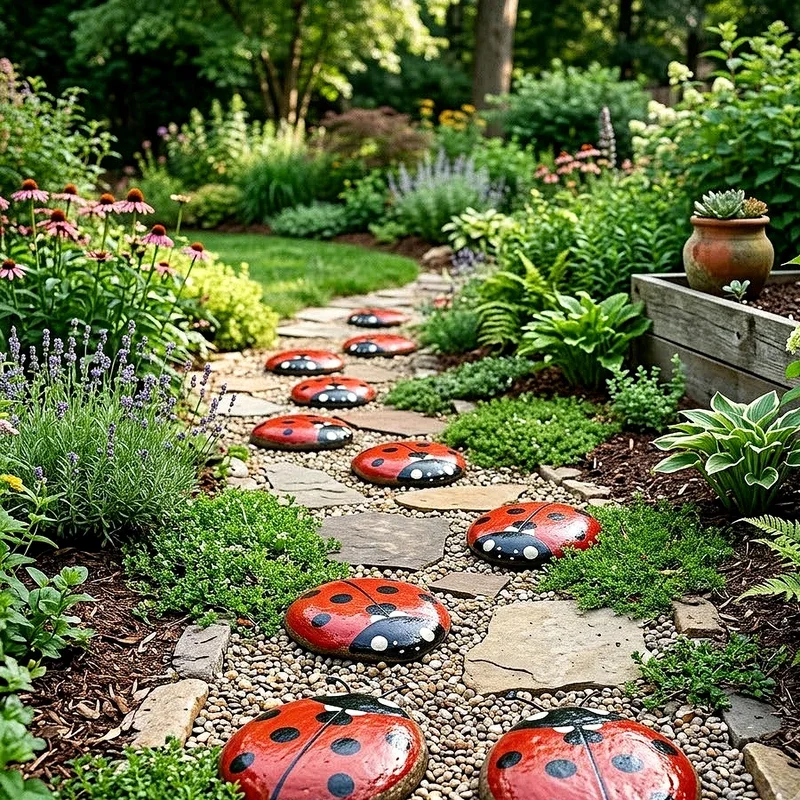
Ladybugs are the gateway drug of rock painting, and I say that with total affection. You need three colors, maybe four, and a steady hand for about ninety seconds. Grab a rounded stone roughly the size of your palm, coat it in bright red or warm orange, then add a black head, a center stripe, and a scatter of dots. Space a dozen of them along the edge of a gravel path and suddenly the walkway has a story. Kids spot them from the driveway. Guests slow down. Why does something so simple work so well? Because our eyes chase repetition, and a line of tiny red beetles pulls you forward like breadcrumbs in a fairy tale. Seal them well, since red pigment fades faster than almost anything else outdoors.
2. Faux Succulents Painted on Smooth Stones
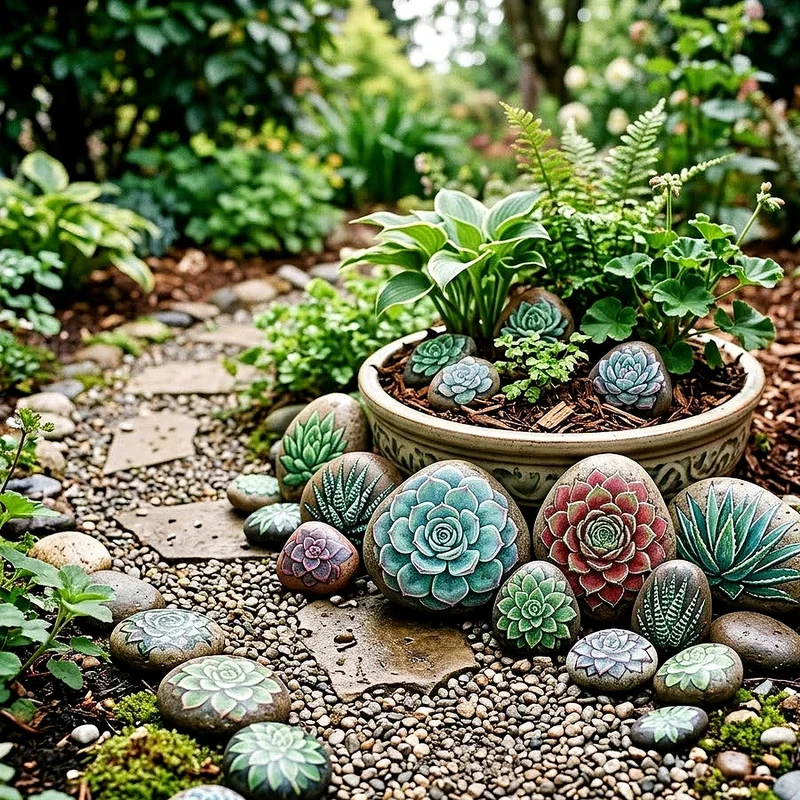
Here is a trick that fools people every single time. Paint a flat, oval stone in soft sage green, then add concentric rings of pointed leaves working from the center outward, lightening each ring slightly. Tuck three or four of these into a planter of real succulents and watch visitors lean in, squint, and finally laugh. It is the garden equivalent of a magic trick you can leave sitting outside. I love this idea for pots that look thin in winter, because painted rosettes never go dormant and never drop a leaf. Use a fine liner brush for the pale edges, since that thin highlight is what sells the illusion. Should you tell your guests? Absolutely not. Let them figure it out on their own.
3. Glow in the Dark Path Markers for Evening Walks
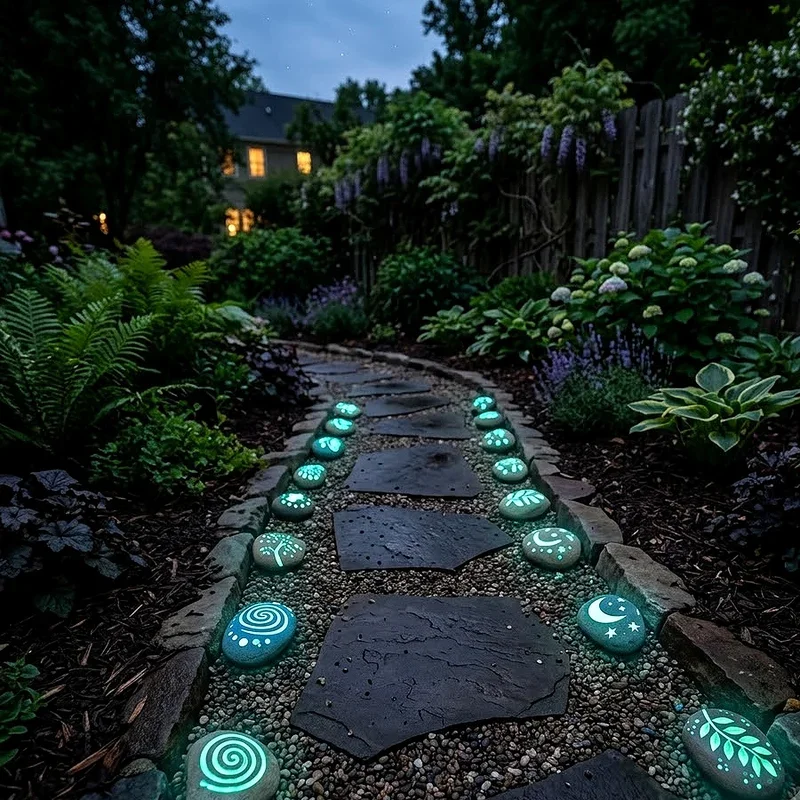
This one earns its keep after sunset. Paint your stones in any base color you like, then add a second layer of glow in the dark acrylic on top, either as a full coat or as swirls, dots, and simple shapes. During the day they look like ordinary garden accents. At night they turn into a soft green trail floating just above the soil. Think of them as fireflies that agreed to hold still. Place them where the path bends or where a step drops, because that is exactly where people stumble in the dark. Charge them in direct sun for a few hours to get the strongest glow. Three coats beat one coat every time, and the difference is honestly dramatic once the light drops.
4. Hand Lettered Herb Labels for Kitchen Planters
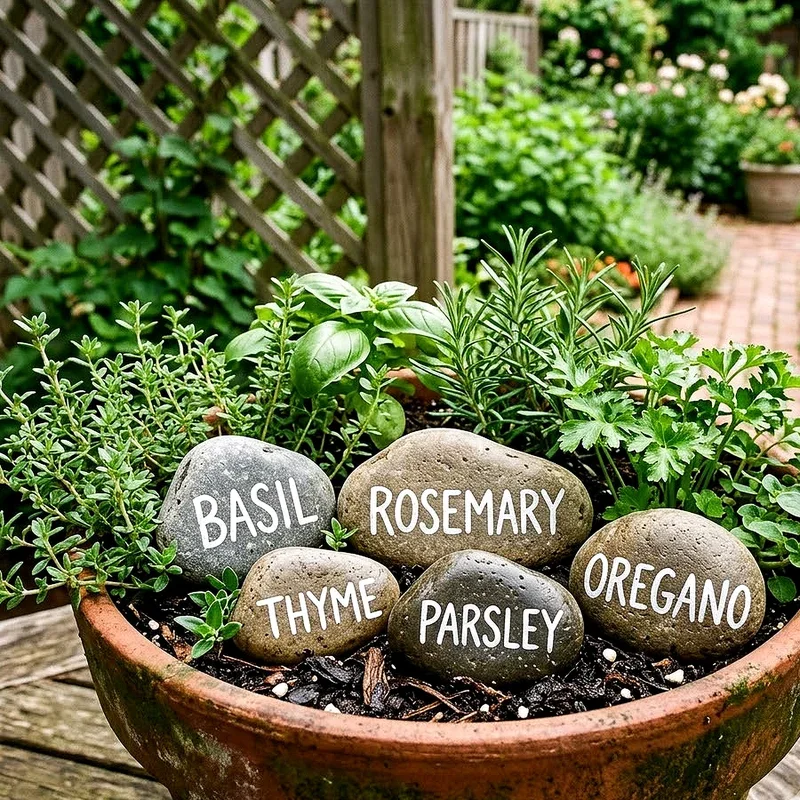
Plastic plant markers snap, fade, and blow away by August. Painted rocks do not. Choose flat stones about the size of a deck of cards, paint them a solid background color, and letter the herb name across the middle in a contrasting shade. White on charcoal reads beautifully. So does black on pale cream. Push each one halfway into the soil at the base of the plant so it stays put through wind and watering. I like adding a tiny sprig illustration under the word, which helps whoever is harvesting when the parsley and cilantro start looking suspiciously similar. Have you ever chopped the wrong herb into dinner? I have, and a two dollar rock would have saved that whole meal.
5. Mandala Rocks for a Quiet Meditation Corner
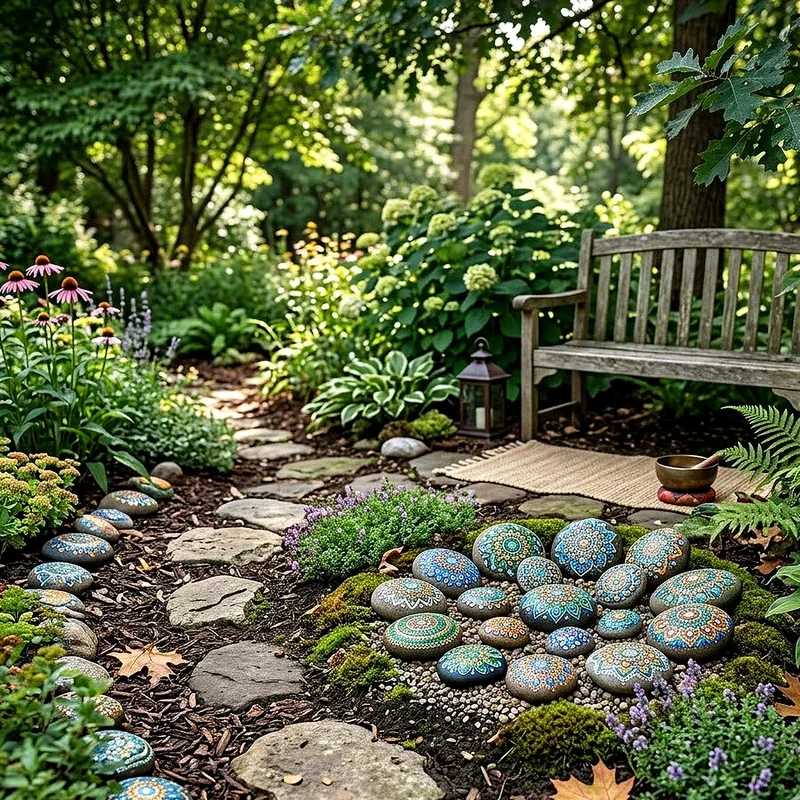
Mandala dot painting takes patience, but that is entirely the point. You work outward from a center dot in rings of shrinking circles, and after twenty minutes your shoulders drop and your brain goes quiet. Use dotting tools, or honestly just the round end of a paintbrush and a few pin heads for the tiny work. Dark stones work best because bright dots pop against black like stars against a night sky. Set a cluster of three near a bench, a birdbath, or wherever you actually sit in the garden. They reward close looking, which means nobody appreciates them from the driveway. That is fine. Some things in a garden should ask you to come closer before they give anything up.
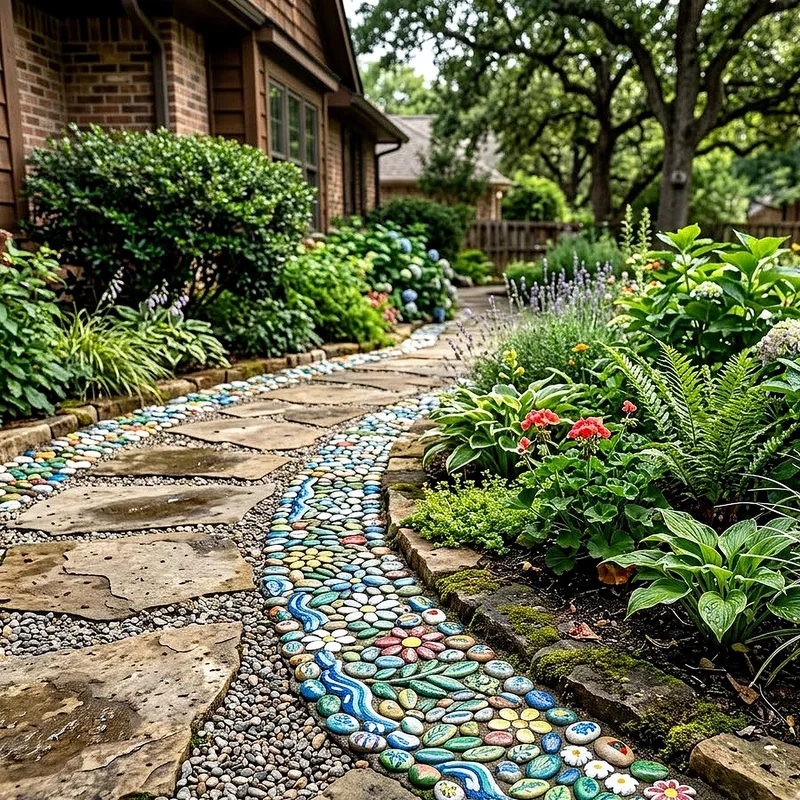
6. Painted Pebble Mosaic Borders Along the Edges
Instead of decorating one big rock, decorate fifty small ones and set them shoulder to shoulder. You are building a mosaic ribbon that runs along a bed edge or frames a planter base. Pick two or three colors, paint the pebbles in solid blocks, then arrange them in stripes, waves, or a simple repeating pattern. From a distance the individual stones disappear and you just see a band of color, like a tiled rug laid at the garden's feet. Press them into damp sand or a thin mortar bed so they hold their line through rain. This project takes an afternoon, maybe two, but it transforms a plain edge into something that looks deliberate and expensive without being either.
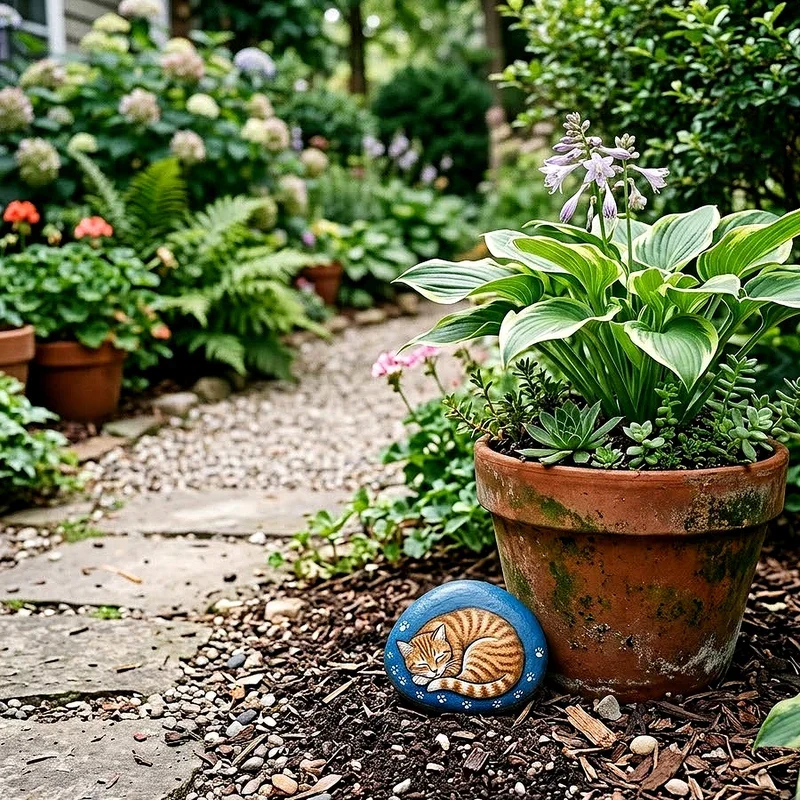
7. Sleepy Cat Rocks Tucked Beside Your Pots
Find a stone with a natural curve, something egg shaped or gently humped, because that shape already suggests a curled up animal. Paint it as a sleeping cat with the tail wrapped around the body, two closed eyes drawn as simple curved lines, and a small pink nose. Tuck it half hidden beside a planter or under the drooping leaves of a hosta. The half hidden part matters enormously. A cat rock sitting in the open is decoration, but a cat rock peeking out from under foliage is a small joke waiting for whoever notices first. Paint one in every color your real pets come in. Then paint a few more in colors no cat has ever been, purely because you can.
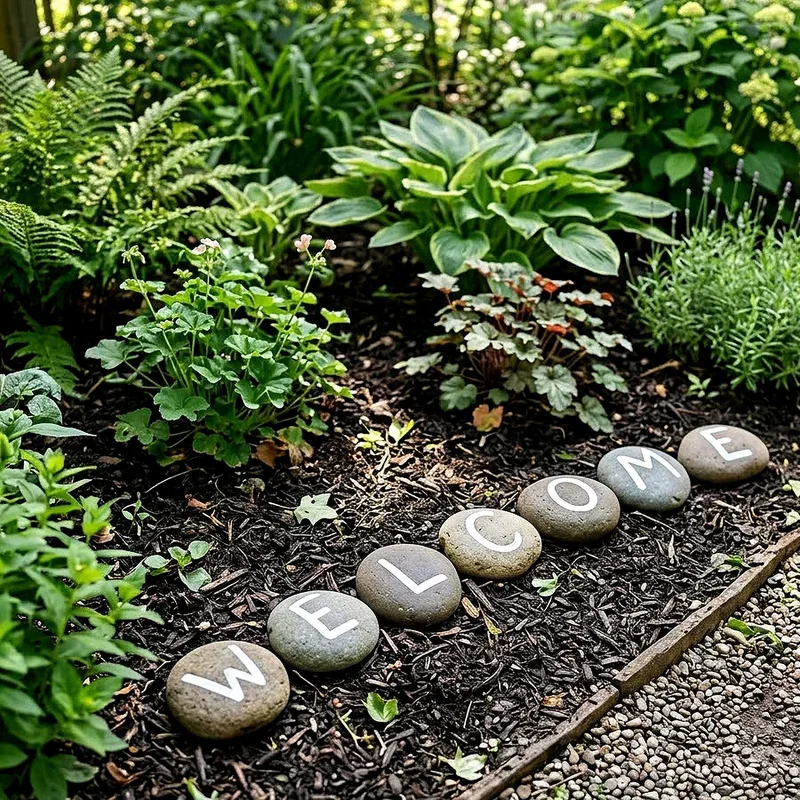
8. Alphabet Stones That Spell Out a Welcome
Words made from individual stones feel handmade in a way printed signs never manage. Paint one large letter per rock, using a bold background and a clean contrasting letter, then line them up beside the front walk to spell WELCOME, GROW, or your family name. Keep the stones roughly the same size so the word reads evenly, since one oversized letter throws the whole line off balance. I sketch each letter in pencil first, because freehand lettering on a curved surface goes sideways fast. Want a version that changes? Paint extra letters and rearrange the message with the seasons. HELLO in spring, HARVEST in fall, and something a little cheeky whenever the mood strikes you.
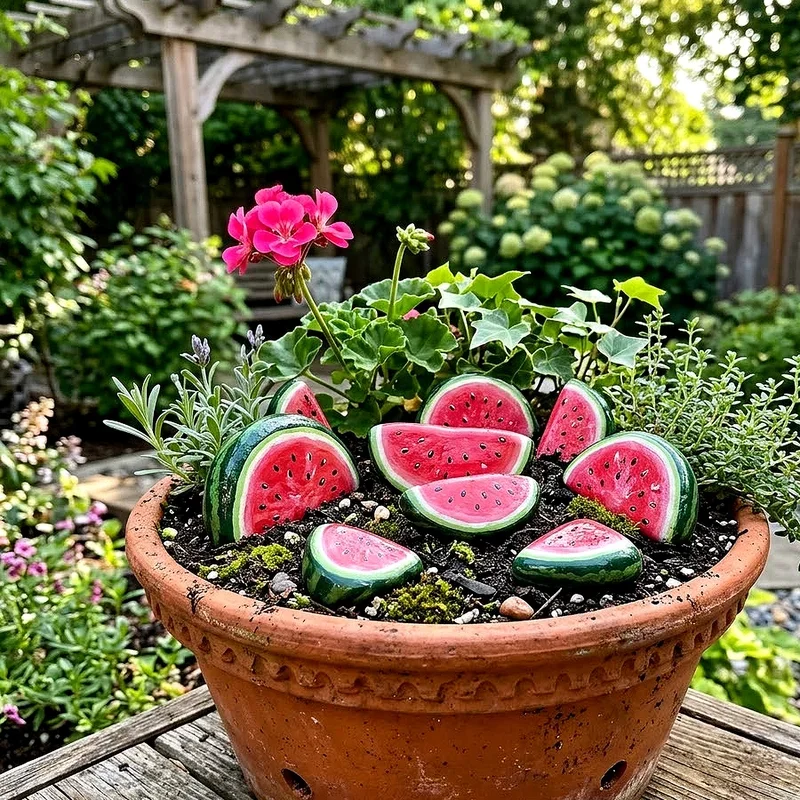
9. Watermelon Slice Rocks for Summer Containers
Some ideas are pure sugar, and this is one of them. Take a stone with a rounded top and flat bottom, paint the curved edge dark green, add a thin white band inside that, then fill the rest with hot pink and a scatter of black seeds. You have a watermelon wedge in about ten minutes. Drop three into a container of trailing petunias and the whole pot suddenly reads as summer. It is the visual equivalent of a screen door slamming and a sprinkler running. These make excellent projects for kids because the shapes are forgiving and the payoff is immediate. Nobody has ever painted a watermelon rock badly enough to ruin the effect. That is a promise.
10. Faux Moss and Lichen on Weathered Grey Stones
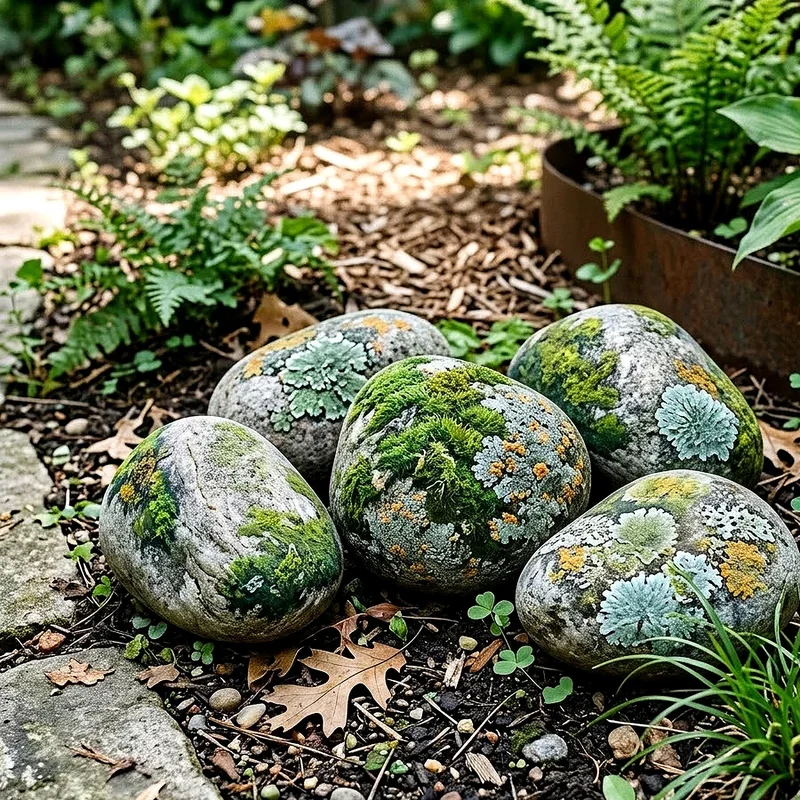
Not every painted rock needs to shout. This one whispers. Start with a grey or brown stone and dab on irregular patches of pale sage, celadon, and dusty green using a sponge or a stiff dry brush. Add a few rings of chalky white to mimic crustose lichen, then let the base color show through in gaps. The goal is a rock that looks like it has been sitting in a damp English woodland for sixty years. Set these among ferns, in shade beds, or along a woodland path where bright colors would feel loud and wrong. Sometimes the best garden art is the piece nobody identifies as art. They just think that corner feels older and more settled somehow.
11. Toadstool Clusters for the Shady Beds
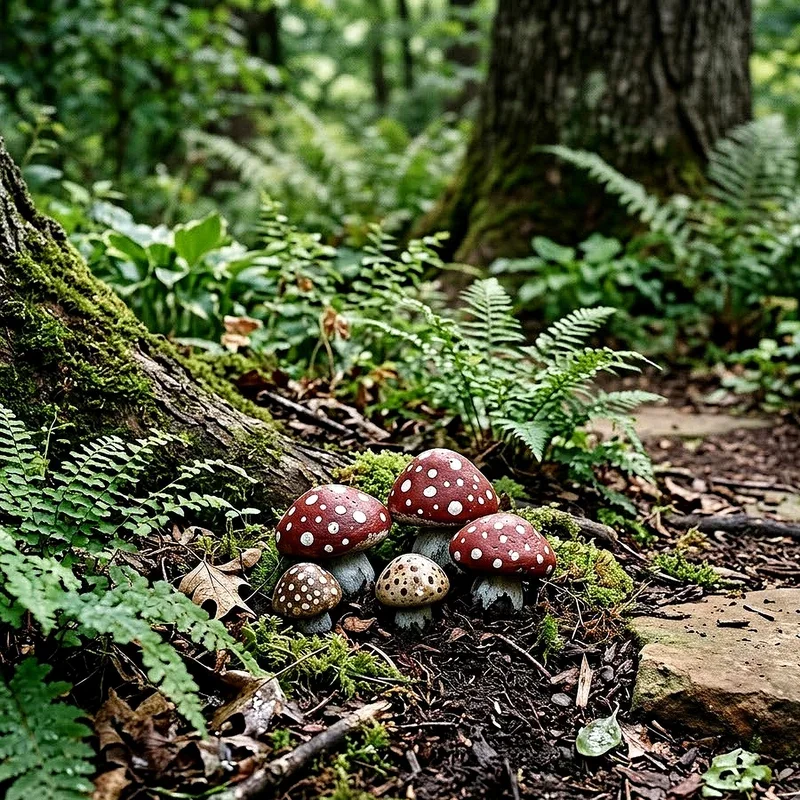
Nothing says fairy tale quite like a red cap with white spots. Paint the top half of a domed stone in deep crimson, dot it generously with white circles, then paint the lower portion cream to suggest a stem. Group three toadstools of different sizes together rather than spacing them evenly, because clusters look natural and rows look like a parking lot. Shady beds under trees are the perfect home for these, since that is where real mushrooms would grow anyway. Add one tiny painted snail nearby if you want to push the whole scene further. My daughter rearranges ours constantly, which I have decided is a feature rather than a problem worth solving.
12. Ombre Gradient Stones Along a Curving Path
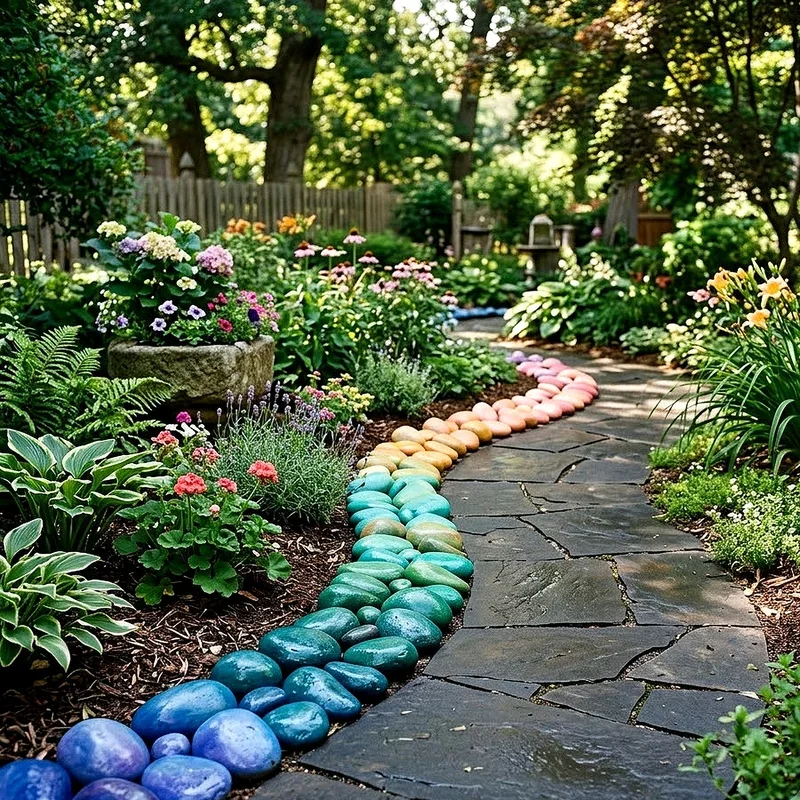
Here is where painted rocks stop looking crafty and start looking designed. Pick one color family, say deep teal through to pale mint, and paint each stone a slightly different shade along that range. Then place them in order along a curving path so the color shifts gradually as you walk. From the far end it reads as a single flowing gesture rather than fifteen separate objects. Think of it as a garden playing one long note that slowly changes pitch. Blues and greens blend into planting beautifully, while sunset oranges and pinks bring real drama to a gravel walk. Keep the shapes uniform here, because the color is doing all the work and odd shapes just create noise.
13. Bumblebee Rocks for the Pollinator Patch
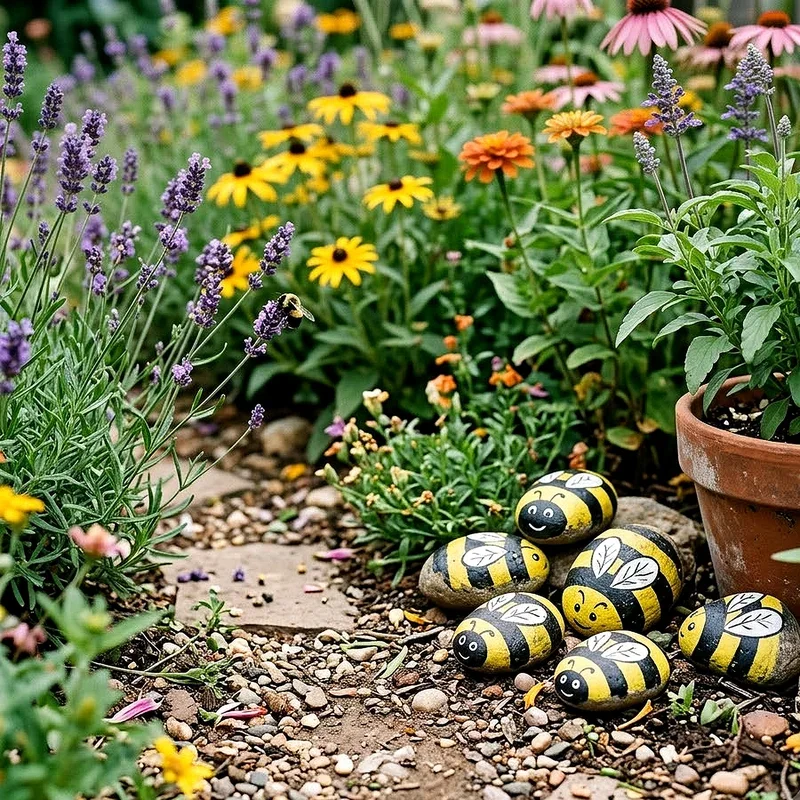
If you have planted lavender, echinacea, or anything else that hums in July, bee rocks belong there. Paint an oval stone in warm golden yellow, add three or four thick black bands across the body, then a small black head and two translucent white wings on top. Fat and round beats sleek and accurate, since a chubby bumblebee reads instantly from six feet away. Scatter them at the base of flowering plants so they look like they just landed. There is something quietly nice about a painted bee sitting in a bed full of real ones. It is a small thank you note to the insects actually doing the work in your garden.
14. Constellation Stones for a Night Garden
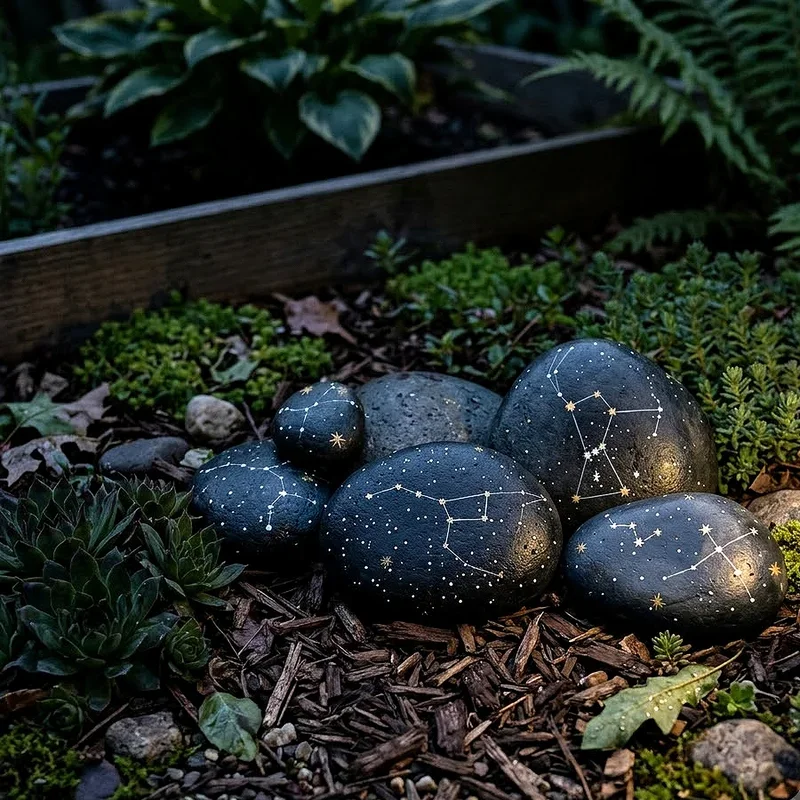
Paint a smooth dark stone in matte black or the deepest navy you own, then add small white dots in the pattern of a real constellation. Orion, the Big Dipper, and Cassiopeia are the easiest to recognize. Connect the dots with hair thin lines if you want the shape to read clearly, or leave them loose and let people work it out. A dusting of tiny scattered specks around the main stars sells the depth of a night sky. Set these near seating where evening conversations happen. Better yet, use glow paint for the stars so the constellation appears once the sun goes down. Your garden gets its own private sky, held in something that fits inside one hand.
15. Kindness Rocks With Words Worth Reading
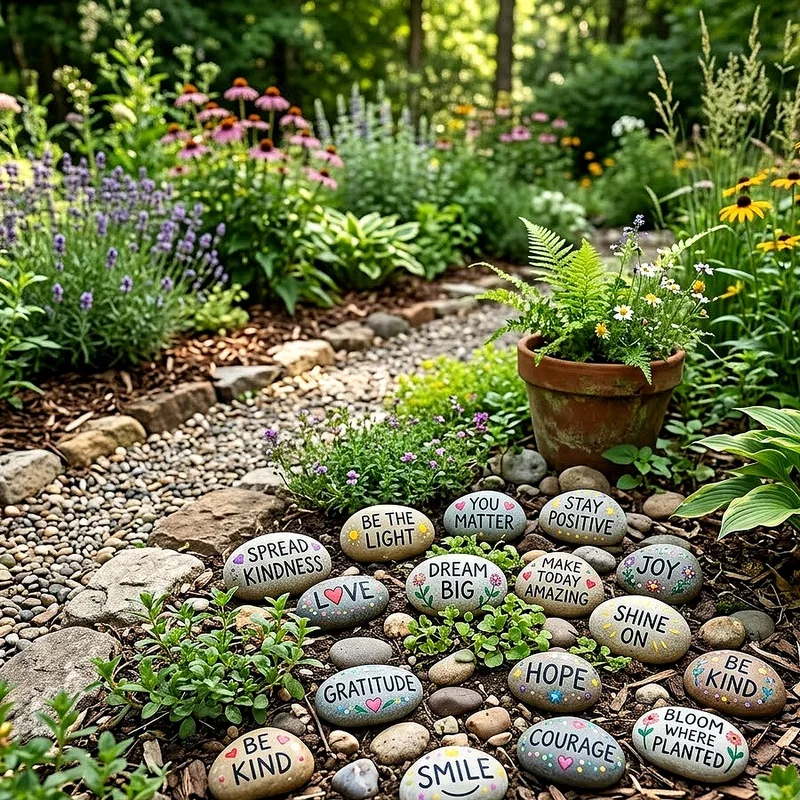
The kindness rock movement caught on for a reason. One short word or phrase painted on a stone, left where a stranger will find it, costs you almost nothing and can genuinely change somebody's afternoon. Keep the message simple, because long sentences crowd a small surface and get hard to read. Breathe. You matter. Keep going. Paint the background in a color that carries well outdoors, then letter the word in something bold and clean. Line a few along your front path where people passing by will see them. Some folks leave extras loose for anyone to take. Is it a small gesture? Sure. But gardens have always been about growing things slowly, and this counts as one of them.
Conclusion
Painted rocks are one of the few garden projects that cost almost nothing and pay you back every single day. You gather the stones on a walk, you paint them on a rainy afternoon, and then they sit outside doing quiet work for years. Start with two or three, see how they look in real light, then add more where the eye wants something to land. Your garden does not need to be big or perfect. It just needs a few small surprises tucked where nobody expects them.
Read next: 15 Lava Rock Garden Ideas for a Bold Outdoor Landscape
Frequently Asked Questions
Q1: What kind of paint works best on outdoor garden rocks?
A: Outdoor acrylic paint works best, since it bonds well to stone and resists rain damage.
Q2: Do I really need to seal my painted rocks?
A: Yes, always. Two or three coats of clear outdoor sealer keep colors bright for years.
Q3: How should I prepare stones before painting them?
A: Scrub them with soap and water, rinse well, then let them dry completely overnight first.
Q4: Which rocks are easiest for beginners to paint on?
A: Smooth, flat river stones are easiest, because paint glides on without catching rough surface texture.
Q5: How long will painted garden rocks actually last outdoors?
A: Properly sealed rocks last two to five years, though direct sun fades reds fastest.