How to Prune a Dogwood Tree for Healthy Growth
Learn how to prune a dogwood tree for healthy growth with expert tips on timing, techniques, and tools for stunning spring blooms.

There's nothing quite like a dogwood tree in full bloom, is there? Those delicate white or pink flowers lighting up your yard every spring can make any gardener's heart sing. But here's the thing: getting those picture-perfect blooms year after year takes a bit of know-how, especially when it comes to pruning. Understanding how to prune a dogwood tree for healthy growth isn't rocket science, but it does require some careful attention and good timing.
If you've ever stood in your backyard, pruning shears in hand, wondering where on earth to start, you're definitely not alone. Many homeowners feel a bit nervous about cutting into their beloved trees. After all, nobody wants to accidentally harm a plant that's been growing for years. The good news is that dogwoods are pretty forgiving when you approach them with the right knowledge and a gentle hand.
Throughout this guide, we'll walk you through everything you need to know about keeping your dogwood tree thriving. From picking the perfect time to prune to understanding which branches need to go, you'll be equipped with all the practical wisdom to transform your tree care routine.
Why Pruning Your Dogwood Tree Actually Matters
Let's be honest here: skipping the pruning session might seem tempting, especially when life gets busy. However, regular maintenance plays a crucial role in your tree's overall health and appearance. When you neglect pruning, dead or diseased branches can become a breeding ground for pests and fungal infections that could spread throughout the entire tree.
Properly trimmed dogwoods develop stronger branch structures that can better withstand heavy rains, strong winds, and even ice storms. Nobody wants to wake up after a storm to find their favorite tree split right down the middle, right? Strategic cuts help distribute the tree's weight more evenly, reducing the risk of storm damage significantly.
Beyond structural benefits, pruning encourages better air circulation within the canopy. Good airflow helps leaves dry quickly after rainfall, which reduces the chances of common dogwood diseases like powdery mildew and spot anthracnose taking hold. Your tree breathes easier, literally speaking.
Additionally, removing dead or crossing branches allows more sunlight to penetrate the interior of the tree. This extra light stimulates new growth and helps flower buds develop more fully. Come springtime, you'll notice a dramatic difference in bloom quality and quantity.
Best Time to Start Your Pruning Project
Timing really is everything when it comes to how to prune a dogwood tree for healthy growth. Making cuts at the wrong time of year can stress your tree unnecessarily or even expose it to disease. So when exactly should you grab those pruning shears?
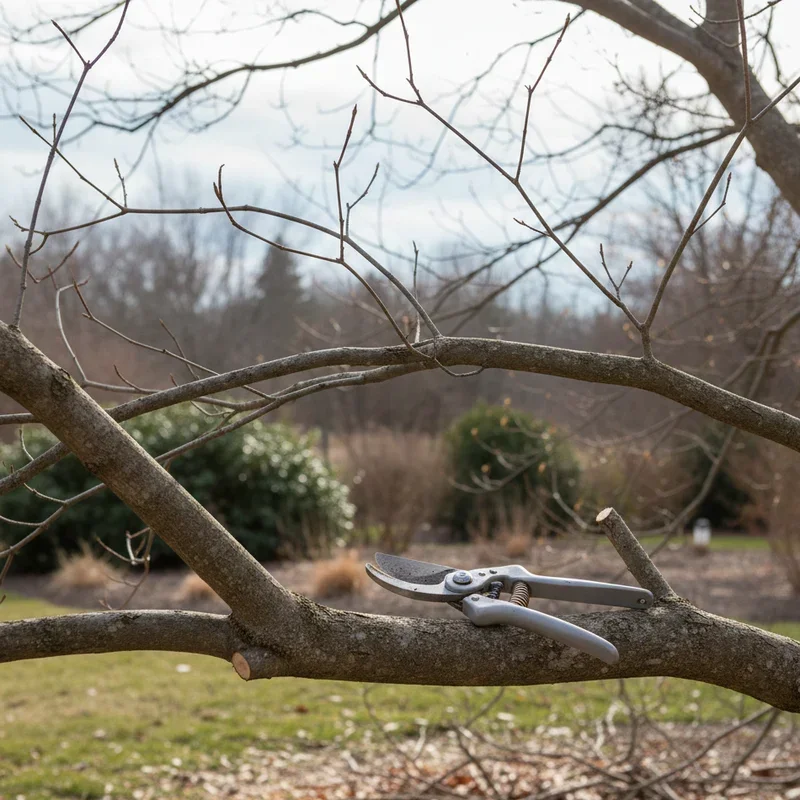
Late winter through early spring represents the ideal window for most pruning tasks. During this dormant period, your dogwood isn't actively growing, which means it can tolerate cuts much better. The absence of leaves also makes it significantly easier to see the branch structure and identify problems.
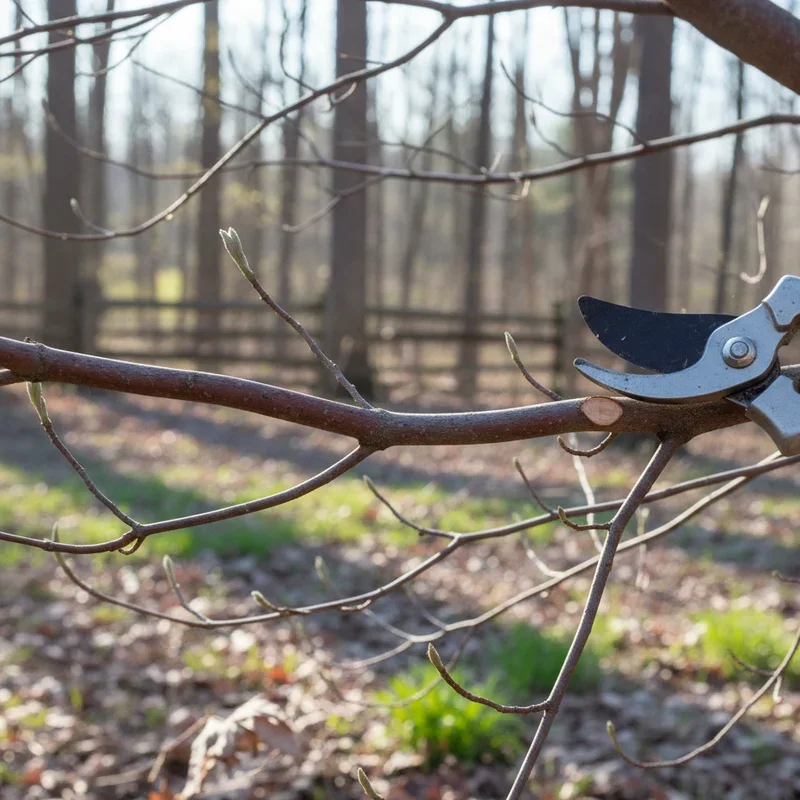
You'll want to complete major pruning before the tree breaks dormancy and starts pushing out new growth. In most regions, this means working sometime between late February and early April. Watch for swelling buds as your signal that the window is closing.
That said, dead or diseased branches shouldn't wait for the perfect season. If you spot something concerning during summer or fall, go ahead and remove it promptly. Leaving damaged wood attached creates entry points for insects and pathogens that could cause bigger problems down the road.
One crucial thing to avoid is pruning during active flowering. Cutting while your tree is blooming wastes all the energy it spent producing those gorgeous flowers and can reduce next year's display. Show some patience and let those blooms complete their show before reaching for the shears.
Essential Tools You'll Need for the Job
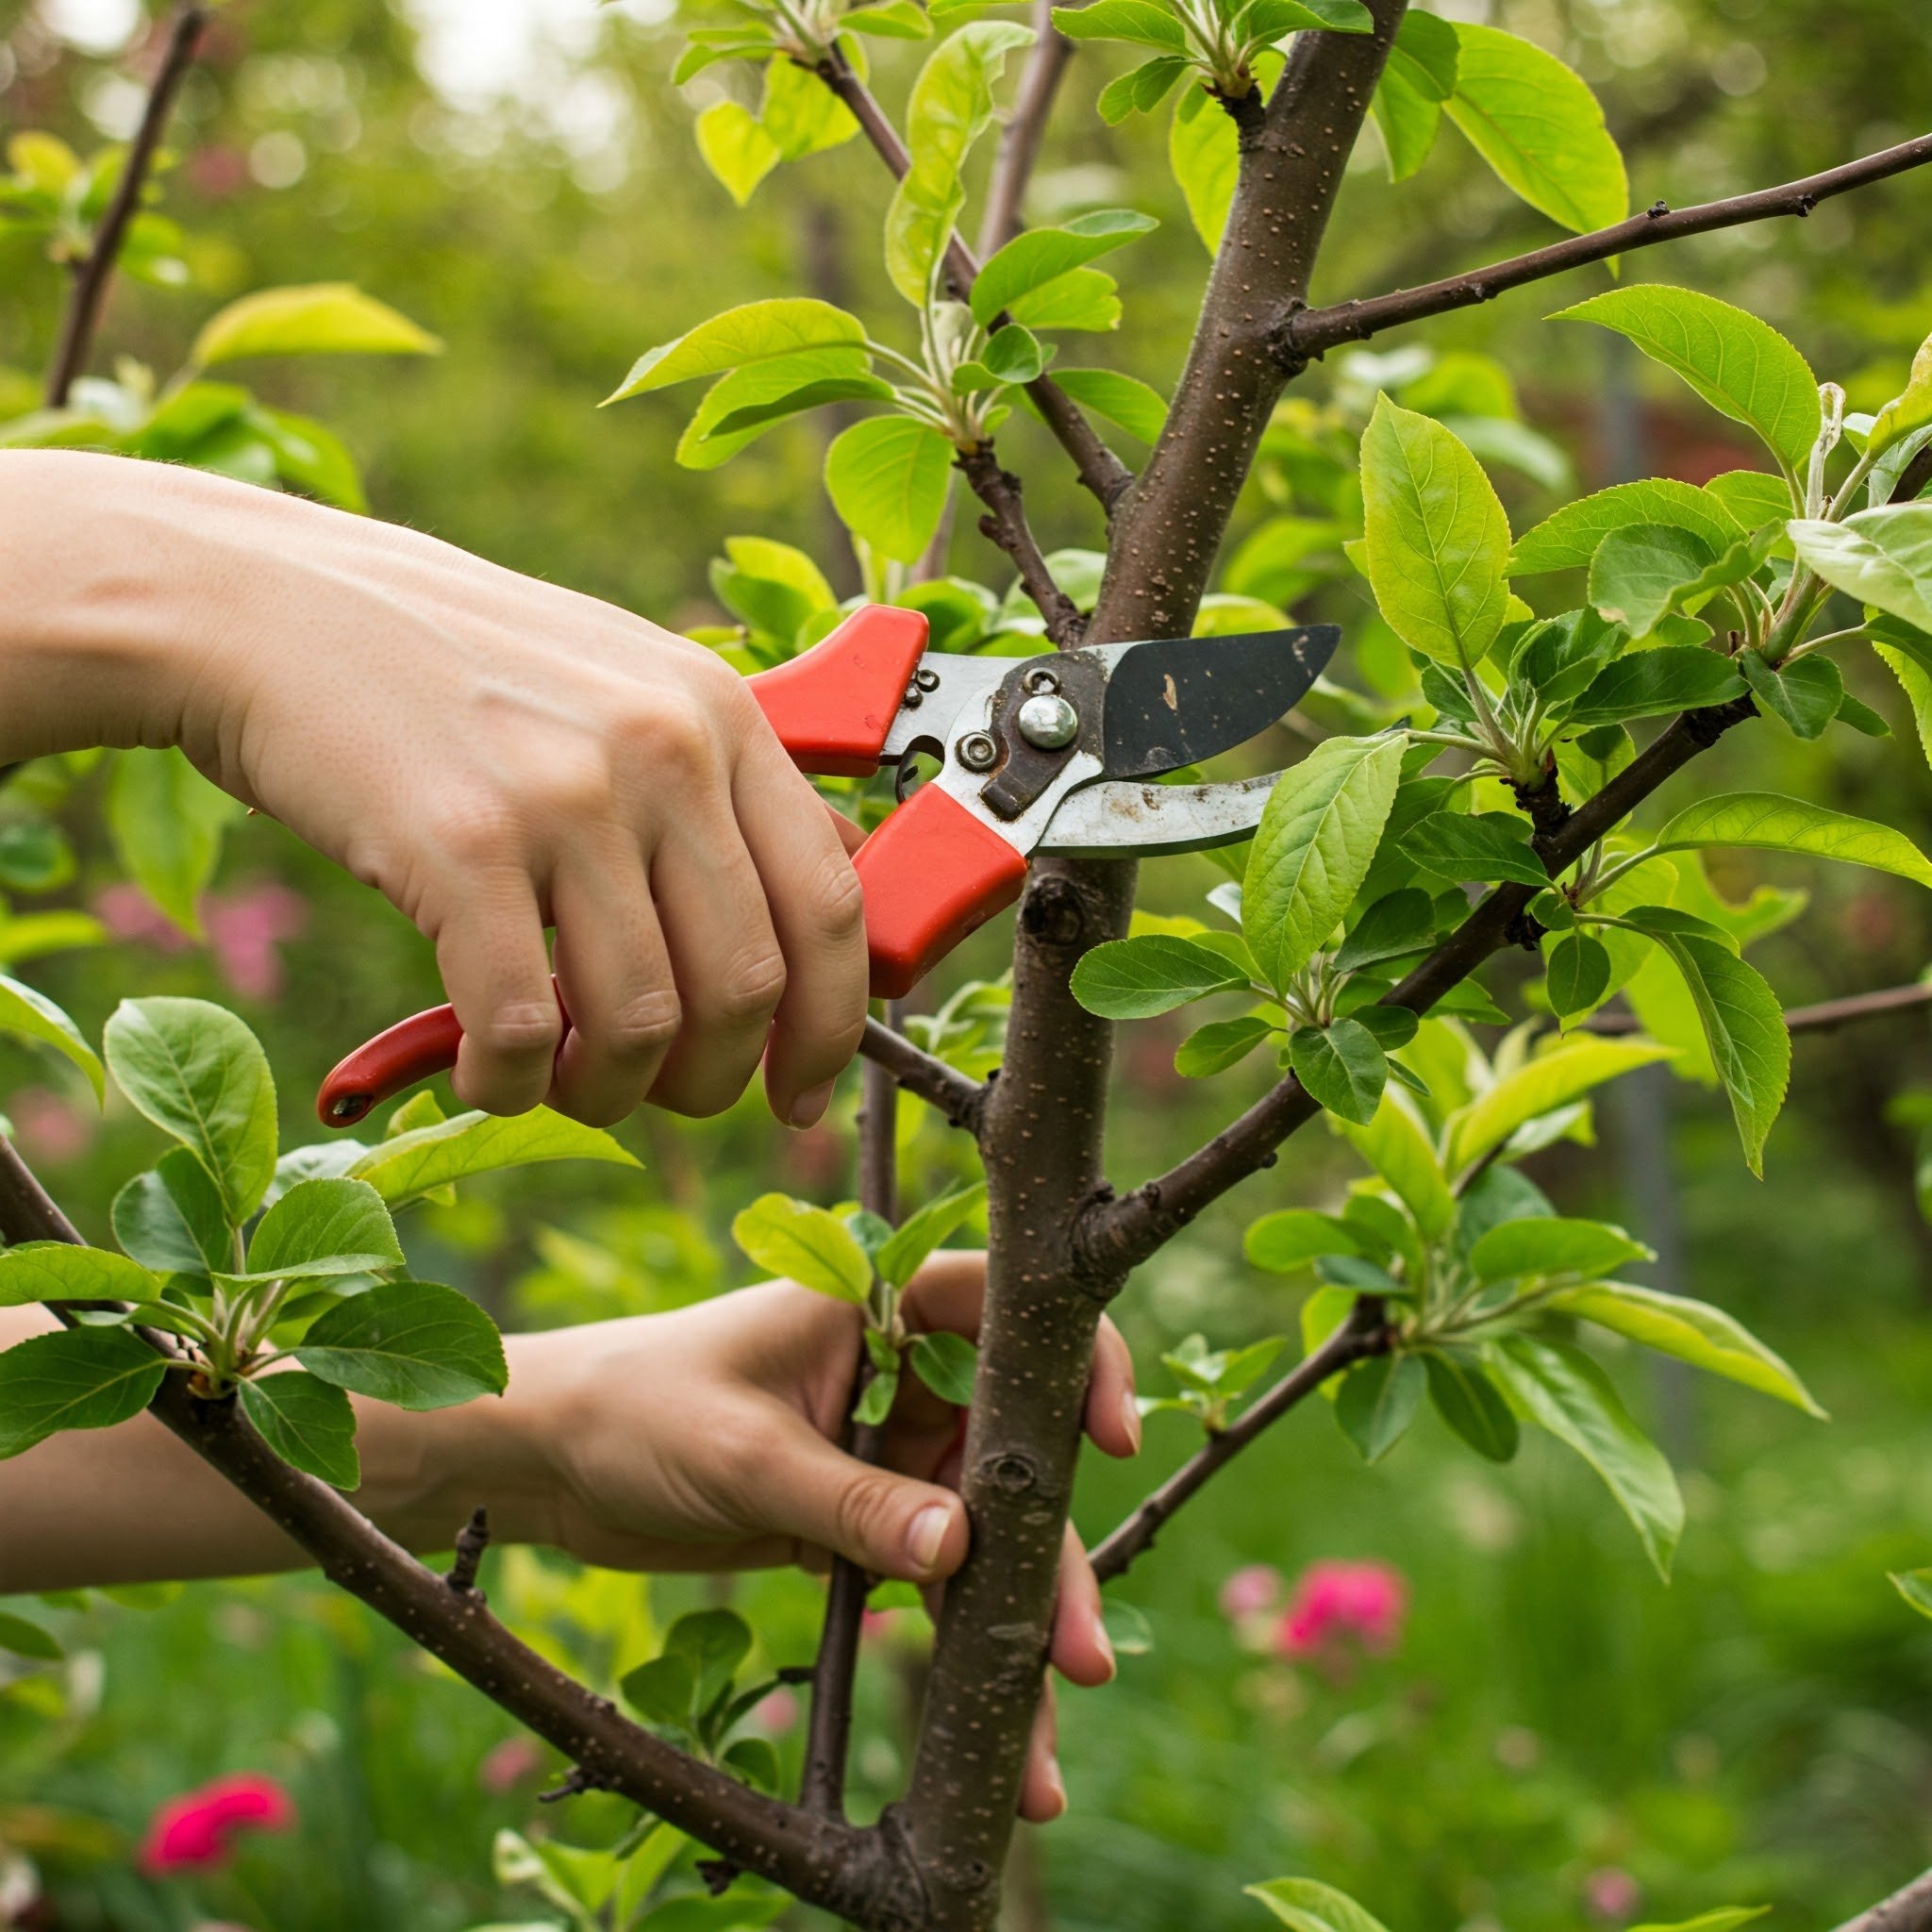
Before diving into the actual cutting, let's talk equipment. Having the right tools on hand makes the whole process smoother and safer, both for you and your tree. Dull or improper tools can crush branches instead of making clean cuts, leading to slow healing and potential disease entry.
Sharp bypass pruning shears work wonderfully for small branches up to about half an inch in diameter. The scissor-like action creates precise cuts that heal quickly. Avoid anvil-style pruners, as these tend to crush woody stems rather than slicing through them cleanly.
For medium-sized branches between half an inch and two inches thick, loppers give you the leverage needed without excessive effort. Look for models with comfortable grips and a good reach to access interior branches easily.
When tackling larger limbs, a sharp pruning saw becomes essential. Curved blades designed specifically for green wood cut faster and cleaner than regular carpentry saws. Some gardeners prefer folding saws for their portability and safety.
Don't forget about cleaning supplies. Wiping your blades with rubbing alcohol or a diluted bleach solution between cuts helps prevent spreading disease from one branch to another. This simple step takes just seconds but provides significant protection.
Step-by-Step Technique for Proper Cuts
Making proper cuts sounds straightforward enough, but technique matters more than you might think. Where you position your cut and how you angle it affects healing speed and the tree's ability to compartmentalize any damage.
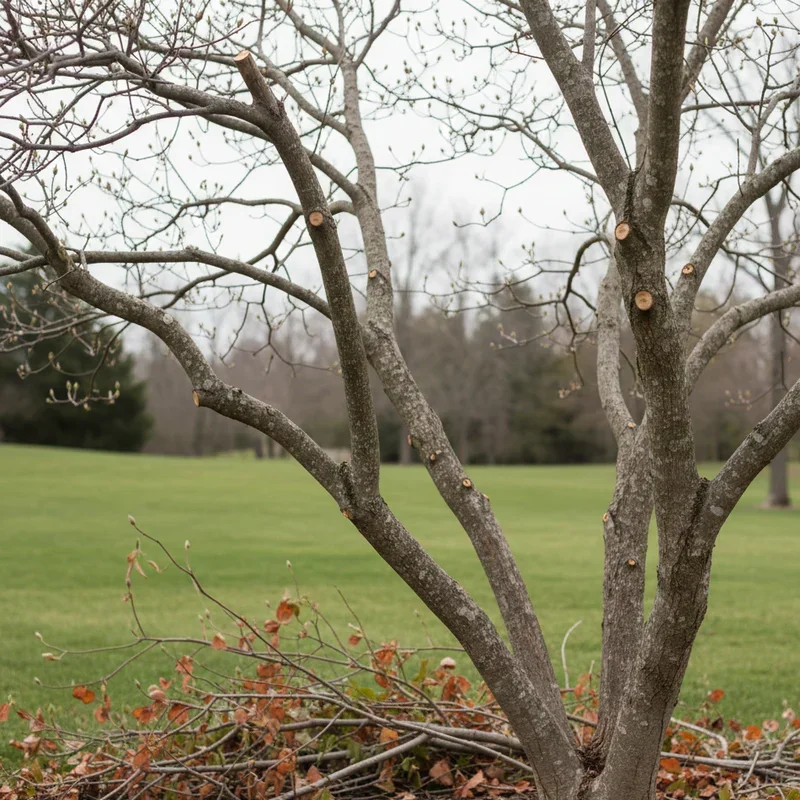
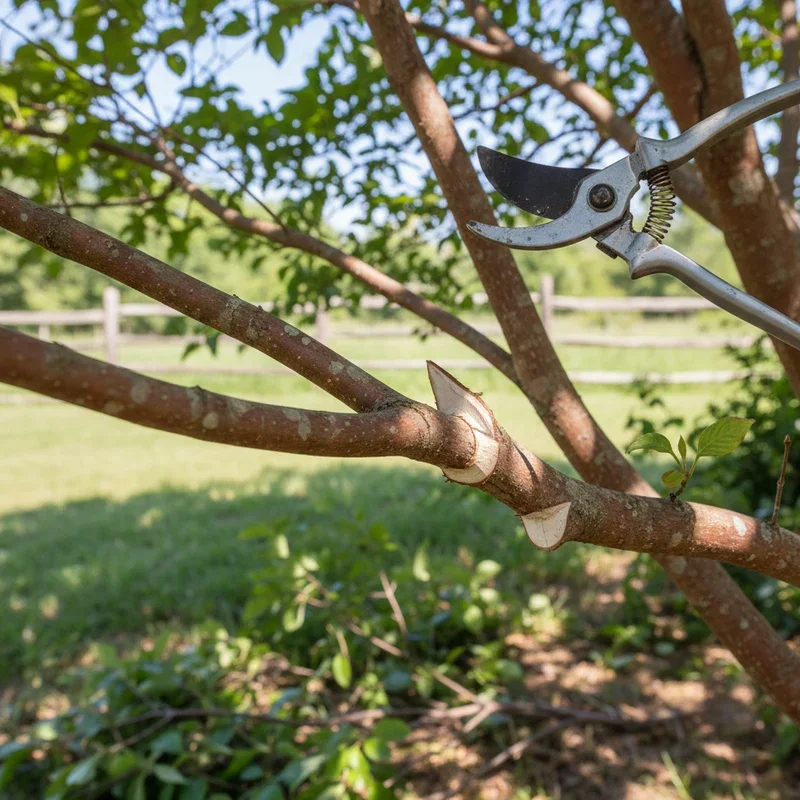
Always cut just outside the branch collar, that slightly swollen area where a branch meets the trunk or a larger limb. Cutting flush with the trunk might look tidier, but it actually removes important tissue that helps the tree seal over wounds. The collar contains specialized cells designed specifically for this healing process.
For smaller branches, a single clean cut angled slightly away from the trunk does the trick. Position your shears so water will run off the cut surface rather than pooling on top, which invites rot and fungal growth.
Larger branches require a three-cut method to prevent bark tearing. Start with an undercut about six inches from the trunk, sawing about one-third of the way through. Make your second cut from the top, a couple inches further out from the first. This allows the branch to fall without ripping bark. Finally, make your clean finishing cut just outside the branch collar.
Resist the urge to apply wound dressings or pruning sealers. Research has shown that these products don't actually help healing and may even trap moisture and pathogens against the wood. Trees seal their own wounds quite effectively when left alone.
Identifying Which Branches Need Removal
Walking up to your dogwood with pruners blazing isn't exactly the best approach. Taking a few minutes to assess the entire tree first helps you develop a smart pruning plan that addresses real problems without removing healthy growth unnecessarily.
Dead branches should always top your list. They're easy to spot in summer when they lack leaves, but during dormancy, look for brittle wood that snaps easily and bark that's loose or peeling. Scraping the bark slightly reveals brown tissue underneath on dead wood versus green on living branches.
Diseased branches often show discoloration, cankers, unusual swelling, or fuzzy fungal growth. Removing these promptly prevents infection from spreading to healthy portions of the tree. Cut several inches below any visible damage to ensure you're getting into clean wood.
Crossing or rubbing branches create wounds that invite trouble. When two branches constantly scrape against each other, they damage the protective bark layer. Remove the weaker or less ideally positioned branch to eliminate the conflict.
Water sprouts, those vertical shoots growing straight up from horizontal branches, rarely contribute anything useful. They crowd the canopy, waste the tree's energy, and look rather awkward. Clip these off close to their point of origin.
Suckers emerging from the base or roots also deserve removal. These vigorous shoots divert resources away from the main tree and can eventually overwhelm the primary trunk if left unchecked.
Shaping for Beautiful Form and Structure
Beyond addressing problems, pruning offers opportunities to guide your dogwood's overall shape and structure. A well-formed tree not only looks more attractive but also grows stronger and stays healthier over time.
Dogwoods naturally develop a graceful, somewhat horizontal branching pattern that most gardeners find appealing. Working with this natural form rather than against it produces the best results. Avoid shearing or trying to create unnatural geometric shapes that fight the tree's instincts.
Focus on maintaining a central leader, the main vertical trunk, with well-spaced scaffold branches radiating outward. Ideally, major branches should emerge at different heights around the trunk rather than clustering at a single point. This arrangement distributes weight evenly and reduces the risk of splitting.
Step back frequently during your pruning session to evaluate the overall silhouette. It's easy to get tunnel vision when you're focused up close on individual branches. Taking a wider view helps you spot imbalances before removing too much from one area.
Remember that less is generally more with dogwoods. These trees don't respond well to heavy pruning in a single session. If significant reshaping is needed, spread the work over several years, removing no more than about one-quarter of the canopy annually.
Common Mistakes and How to Avoid Them
Even experienced gardeners occasionally slip up when pruning. Knowing the most common pitfalls helps you sidestep them and keep your dogwood in peak condition.
Topping, or cutting back the main leader and major branches to stubs, ranks among the worst things you can do to any tree. This drastic approach triggers a flush of weak, poorly attached water sprouts and ruins the natural form permanently. Never top your dogwood regardless of how overgrown it might seem.
Leaving stubs sticking out past the branch collar prevents proper healing and creates dead zones where decay can set in. Always cut cleanly at the collar without leaving excess wood behind.
Removing too much in one season stresses the tree severely. Dogwoods depend on their leaves to produce food through photosynthesis. Taking away more than about twenty-five percent of the canopy at once can starve the tree and trigger desperate survival responses.
Pruning during wet weather spreads diseases more easily. Fungal spores and bacterial infections travel readily in water droplets. Wait for a dry day to do your cutting whenever possible.
Ignoring your tools between uses allows rust to develop and edges to dull. Clean, sharpen, and lightly oil your pruning equipment at the end of each season. You'll be grateful next spring when everything works smoothly.
Caring for Your Tree After Pruning
Your work doesn't quite end once the cutting stops. A little post-pruning care helps your dogwood bounce back faster and stronger than ever.
Watering becomes especially important if you've removed significant foliage. The remaining leaves need to work harder to support the tree's needs. During dry spells, provide deep soakings rather than frequent light sprinklings. This encourages roots to grow downward seeking moisture.
A layer of organic mulch around the base provides multiple benefits. Spread two to four inches of shredded bark or composted leaves in a circle extending to the drip line, keeping it several inches away from the trunk itself. This moderates soil temperature, conserves moisture, and adds nutrients as it breaks down.
Resist the temptation to fertilize heavily right after pruning. Pushing rapid new growth when the tree is recovering can do more harm than good. Wait until the following growing season to apply any nutrients, and then use a balanced, slow-release formula.
Monitor the pruning wounds periodically over the coming months. Healthy callus tissue should gradually form around the edges, eventually sealing over the cuts completely. If you notice spreading discoloration, oozing, or other concerning signs, consult a certified arborist for evaluation.
How to Prune a Dogwood Tree for Healthy Growth in Different Situations
Circumstances vary quite a bit from one yard to another, and your approach might need adjustments based on your specific situation.
Young trees just getting established benefit from early training that sets them up for success. Focus on developing good structure by selecting strong scaffold branches and eliminating competing leaders. Light, frequent attention during the first few years prevents bigger problems later.
Mature specimens that have been neglected for years require more patience. Don't try fixing decades of growth in one afternoon. Prioritize hazards first, then gradually improve form over multiple seasons. Rushing the process shocks older trees badly.
Trees recovering from storm damage need prompt attention to remove hanging or broken branches that pose safety risks. However, wait to assess the full extent of damage once things calm down. What looks terrible immediately after a storm sometimes looks much more manageable once debris is cleared.
Dogwoods struggling with disease or pest issues may need more aggressive pruning to remove affected wood. Sterilize your tools between every single cut in these situations to avoid spreading problems. Dispose of diseased material by burning or bagging for landfill rather than composting.
Conclusion
Mastering how to prune a dogwood tree for healthy growth transforms both your tree and your confidence as a gardener. By choosing the right timing, using proper techniques, and making thoughtful decisions about which branches to remove, you set your dogwood up for years of vigorous growth and spectacular spring displays. Take it slow, respect the tree's natural form, and remember that patience produces the most beautiful results.
Read next: How to Prune Trees Like a Pro? Tips and Techniques
Frequently Asked Questions
1.How often should I prune my dogwood tree?
Annual light pruning during late winter maintains optimal health and beautiful form.
2.Can I prune my dogwood tree during summer?
Summer pruning works for dead or diseased branches but avoid major cuts.
3.What happens if I prune my dogwood too heavily?
Excessive pruning stresses the tree and triggers weak, unsightly water sprout growth.
4.Should I seal pruning cuts on my dogwood tree?
No, wound sealers actually hinder natural healing and may trap harmful moisture.
5.Why are the leaves on my pruned dogwood turning brown?
Browning often indicates pruning during the wrong season or overly aggressive cutting.