How to Plant Strawberry Seeds: Simple Steps to Begin Your Berry Adventure
Learn how to plant strawberry seeds with ease! Discover simple steps, expert tips, and common mistakes to avoid for a thriving berry garden.

Growing strawberries from seeds is honestly one of the most rewarding gardening adventures you'll ever embark on. Sure, it takes a bit more patience than grabbing starter plants from the nursery, but there's something genuinely magical about watching those tiny seeds transform into lush, fruit-bearing plants. Whether you've got a sprawling backyard or just a sunny windowsill, starting strawberries from seed opens up a whole world of varieties you won't find at your local garden center. And hey, if you're reading this, you're probably curious about getting your hands dirty and growing these sweet little gems from scratch. Well, you've come to the right place! This guide will walk you through everything you need to know about how to plant strawberry seeds, from selecting the right varieties to troubleshooting common hiccups along the way.
Why Start Strawberries From Seeds
Now, you might be wondering why anyone would bother with seeds when starter plants are readily available. Good question! Starting from seeds gives you access to hundreds of varieties that you'll never see in stores. We're talking about unique flavors, colors, and sizes that'll make your garden the talk of the neighborhood. Plus, it's way more budget-friendly. A single packet of seeds costs less than a couple of starter plants, and you'll get dozens of potential plants from it. Another bonus? You'll have complete control over the growing process from day one, which means no worrying about diseases or pests that might hitch a ride on nursery plants. And let's be real, there's an incredible sense of accomplishment that comes with nurturing something from its absolute beginning. It's like being a plant parent from the maternity ward, if you will.
Choosing the Right Strawberry Seeds
Picking the perfect strawberry seeds is your first real decision in this journey. Strawberries generally fall into three categories: June-bearing, ever-bearing, and day-neutral varieties. June-bearing types produce one massive harvest in late spring or early summer, which is fantastic if you're into making preserves or freezing berries. Ever-bearing varieties give you two to three harvests throughout the growing season, while day-neutral strawberries produce fruit continuously from spring until frost. Pretty neat, right? Consider your climate too. Some varieties handle heat better, while others thrive in cooler conditions. If you're working with limited space, alpine strawberries are absolute champs for containers and small gardens. They're smaller but pack an incredible flavor punch. Read those seed packets carefully! They'll tell you everything from days to maturity to flavor profiles. And hey, don't be afraid to experiment with a few different types. Variety is the spice of life, after all.
Gathering Your Supplies
Before we get into the nitty-gritty of planting, let's make sure you've got everything you need. First up, you'll want seed-starting mix, not regular potting soil. Seed-starting mix is lighter and sterile, which helps prevent diseases that can knock out tiny seedlings. Grab some shallow containers with drainage holes. Seed trays work great, but honestly, even cleaned yogurt containers with holes poked in the bottom will do the trick. You'll also need a spray bottle for gentle watering, clear plastic wrap or a humidity dome to maintain moisture, and decent lighting. A sunny south-facing window might work, but a simple grow light gives more reliable results. Don't forget plant labels, because trust me, you'll forget which variety is which faster than you'd think. Optional but helpful: a seedling heat mat can speed up germination considerably. Room temperature water and a bit of patience round out your supply list. See? Nothing too fancy or expensive required here!
Preparing Strawberry Seeds for Planting
Here's where things get interesting. Strawberry seeds actually benefit from a process called cold stratification, which basically tricks them into thinking they've survived winter. This breaks their dormancy and improves germination rates significantly. To do this, place your seeds in a damp paper towel, fold it up, and stick it in a sealed plastic bag. Pop that bag in your refrigerator for about three to four weeks. Yeah, it's a waiting game, but good things come to those who wait! Check on them weekly to make sure the paper towel stays moist but not soaking wet. Some gardeners skip this step and still get decent results, but stratification really does make a noticeable difference. If you're working with fresh seeds from berries you've eaten, you'll definitely want to stratify them. Store-bought seed packets sometimes come pre-stratified, so check the instructions. After the cold treatment, your seeds are primed and ready to rock.
How to Plant Strawberry Seeds: Simple Steps to Begin
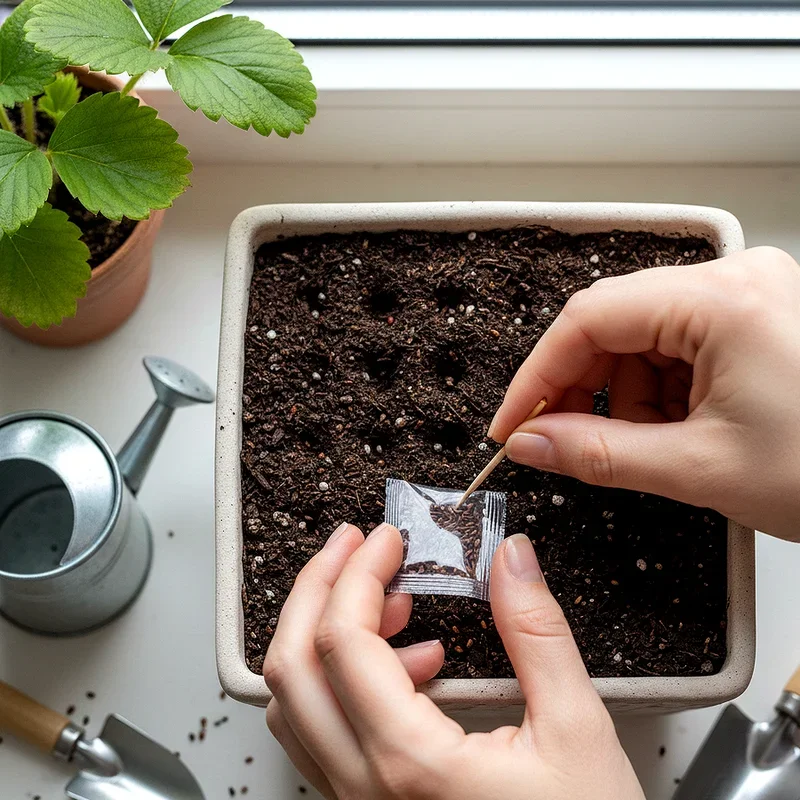
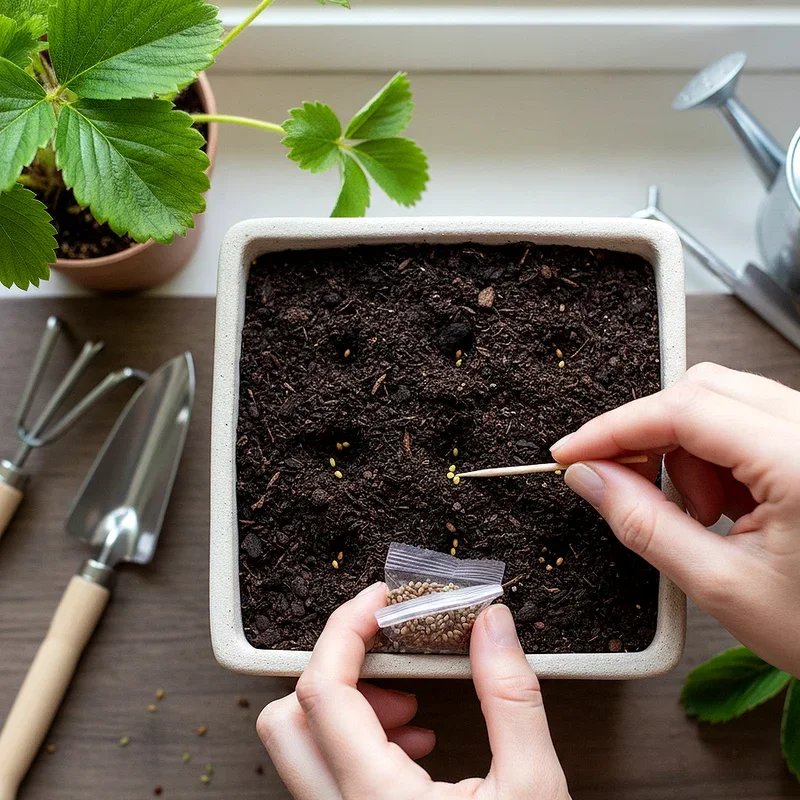
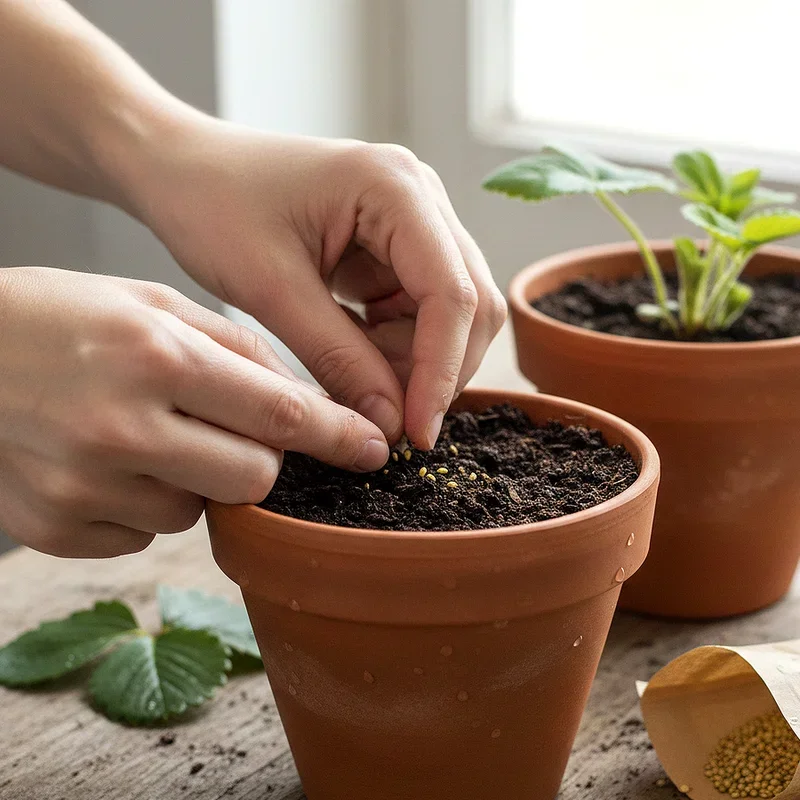
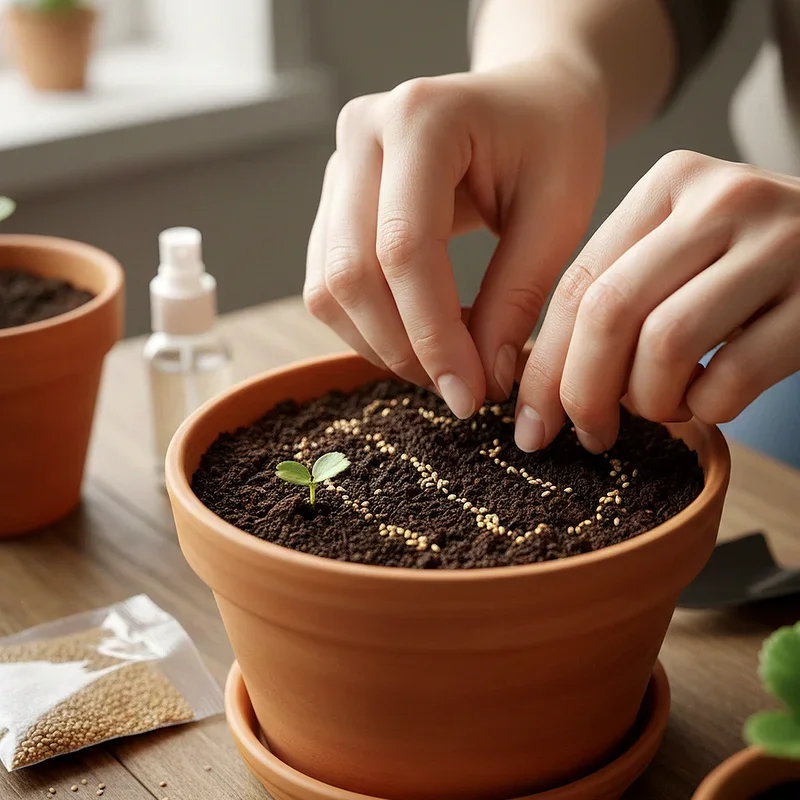
Alright, this is the moment you've been waiting for! Fill your containers with moistened seed-starting mix, leaving about a quarter inch from the top. The mix should be damp like a wrung-out sponge, not soggy. Now here's the tricky part: strawberry seeds are tiny, and they need light to germinate. That means you'll barely cover them, if at all. Gently press the seeds onto the soil surface, spacing them about an inch apart. You can sprinkle a whisper-thin layer of mix over them or leave them exposed. Either way works! Mist the surface with your spray bottle to settle everything in. Cover your containers with plastic wrap or a humidity dome to create a mini greenhouse effect. Place them in a warm spot, ideally between 65 and 75 degrees Fahrenheit. If you've got a heat mat, now's the time to use it. Keep the soil consistently moist but never waterlogged. Germination typically takes anywhere from one to six weeks, so don't panic if nothing happens right away. Patience is definitely a virtue here!
Caring for Strawberry Seedlings
Once those first green shoots appear, you'll feel like throwing a party! Remove the plastic covering gradually over a few days to help seedlings adjust to lower humidity. Light becomes crucial at this stage. Seedlings need about 12 to 16 hours of light daily, so if you're relying on natural light, supplement with grow lights. Keep them just a few inches above the seedlings and raise them as plants grow. Water from the bottom when possible by placing containers in a tray of water, which encourages strong root development. The soil surface should stay barely moist. Watch out for damping off, a fungal disease that causes seedlings to collapse at the soil line. Good air circulation and proper watering prevent this. When seedlings develop their second set of true leaves, it's time to thin them out. Yeah, it feels harsh, but giving remaining plants more space makes them stronger. Snip weaker seedlings at soil level rather than pulling them, which could disturb roots of keepers.
Transplanting Seedlings
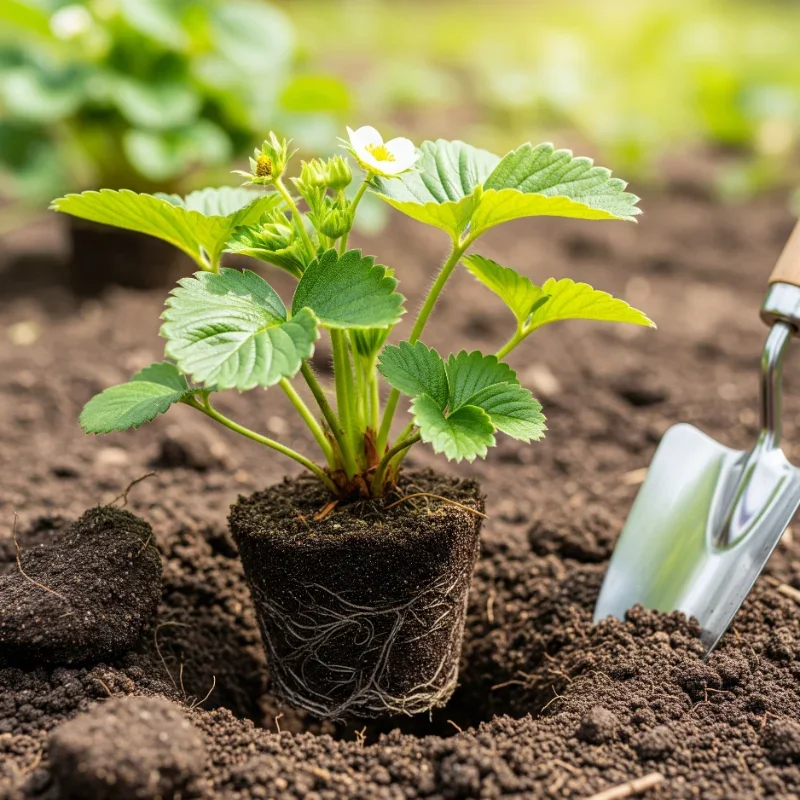
Your seedlings will need individual homes once they've got three or four sets of true leaves. Fill small pots with quality potting mix and carefully transplant each seedling, handling them by their leaves rather than delicate stems. Bury them slightly deeper than they were growing, right up to the first set of leaves. This encourages additional root development along the buried stem. Water gently and keep them in a protected spot for a few days while they recover from the shock. Gradually introduce them to outdoor conditions through a process called hardening off. Start by placing them outside in a sheltered spot for an hour or two, then bring them back in. Increase outdoor time daily over about two weeks. This prevents transplant shock when they finally go into the garden permanently. Don't skip this step! Going straight from indoors to full sun and wind is like jumping into a cold pool without testing the water first.
Choosing the Perfect Growing Location
Strawberries are sun lovers, plain and simple. They need at least six to eight hours of direct sunlight daily for the best fruit production. Pick a spot with well-draining soil because strawberries absolutely hate wet feet. If your soil is heavy clay, consider raised beds or containers instead. The soil pH should be between 5.5 and 6.5, which is slightly acidic. A simple soil test from your local extension office will tell you where you stand. Avoid areas where tomatoes, peppers, or potatoes grew recently, as they can harbor diseases that affect strawberries. Good air circulation helps prevent fungal problems, so don't crowd plants into tight spaces. If you're container gardening, choose pots at least 10 to 12 inches deep with plenty of drainage holes. Hanging baskets work wonderfully too! Consider accessibility for watering and harvesting. Nothing's worse than realizing your berry patch is in an awkward spot when you're trying to pick ripe fruit every morning.
Preparing Your Garden Bed
Time to get that planting area ready! Start by clearing away weeds, rocks, and debris. Work organic matter like compost or aged manure into the top six to eight inches of soil. This improves drainage, adds nutrients, and creates that fluffy texture strawberry roots love. If you're building raised beds, aim for at least eight to twelve inches of depth. Mix your native soil with compost in about equal parts for an ideal growing medium. Create slight mounds or ridges if drainage is questionable. Strawberries planted on these elevated areas stay healthier in wet conditions. Space is important too. Plants eventually spread through runners, so plan accordingly. For matted row systems, space plants about 18 to 24 inches apart in rows three to four feet apart. Hill systems keep things more compact with plants spaced 12 inches apart. Add a layer of mulch after planting to suppress weeds and maintain soil moisture. Straw works great and gives strawberries their name, though pine needles or wood chips work too.
Planting Strawberries in the Garden
When nighttime temperatures consistently stay above freezing, your seedlings are ready for their permanent home. Dig holes slightly larger than your seedling root balls. The crown of the plant, where leaves meet roots, should sit right at soil level. Too deep and the crown rots. Too shallow and roots dry out. It's a Goldilocks situation! Spread roots out in the hole before backfilling with soil. Firm the soil gently around each plant and water thoroughly to eliminate air pockets. If you're planting multiple varieties, keep them separated and labeled so runners don't mix everything up later. Water deeply after planting and keep soil consistently moist for the first few weeks while plants establish. Morning watering is best because it allows foliage to dry before evening, reducing disease risks. Some gardeners pinch off flowers the first year to encourage stronger plant development instead of early fruiting. That's a tough call, but it does pay off with better harvests in following years.
Watering and Feeding Your Strawberry Plants
Strawberries need about one to two inches of water weekly, either from rain or irrigation. Deep, infrequent watering encourages deeper root systems compared to frequent shallow watering. Drip irrigation or soaker hoses work brilliantly because they keep water off the foliage. Overhead watering invites fungal diseases, especially if done in the evening. Check soil moisture by sticking your finger about an inch deep. If it's dry, water. If it's moist, wait. During flowering and fruiting, consistent moisture is critical for plump, juicy berries. As for feeding, strawberries aren't particularly heavy feeders. A balanced fertilizer applied at planting time usually suffices. You can side-dress with compost in early spring and again after the first harvest. Avoid high-nitrogen fertilizers, which promote leafy growth at the expense of fruit. Organic options like fish emulsion or compost tea work wonderfully. Some gardeners use specially formulated berry fertilizers. Whatever you choose, follow package directions carefully. More isn't better when it comes to fertilizing!
Managing Runners and Maintaining Plants
Here's where strawberry plants get interesting. They produce runners, which are long stems that develop baby plants at their tips. For matted row systems, you'll allow some runners to root and fill in the bed. For hill systems or containers, you'll snip off runners to keep plants focused on fruit production rather than reproduction. Neither approach is wrong. It depends on your goals! Remove any dead or yellowing leaves regularly to improve air circulation and reduce disease pressure. After harvest, many gardeners renovate their strawberry beds by mowing plants down to about three inches and raking away old leaves. This sounds brutal but actually rejuvenates plants for next year's crop. Mulch depth should be maintained at about two to three inches. In fall, after the ground freezes, add extra mulch to protect crowns from winter damage in cold climates. Remove this extra covering in spring when new growth appears. Every three to four years, consider starting fresh with new plants since productivity declines as beds age.
Dealing with Common Problems
Even with the best care, problems can pop up. Aphids love tender new growth. Blast them off with water or use insecticidal soap. Slugs and snails go crazy for ripe berries. Beer traps or diatomaceous earth around plants help control them. Birds are probably your biggest competition for ripe fruit. Netting draped over plants keeps feathered thieves away. Gray mold, or botrytis, causes berries to rot with fuzzy gray growth. Good air circulation, proper spacing, and avoiding overhead watering minimize this fungus. Powdery mildew appears as white powder on leaves. Remove affected foliage and improve air movement. Verticillium wilt causes plants to wilt and die. There's no cure, so prevention through crop rotation and resistant varieties is key. Root weevils notch leaf edges at night. They're more annoying than devastating, but beneficial nematodes can control their larvae in soil. Don't let problems overwhelm you, though! Most strawberry plants are pretty resilient and bounce back from minor issues quickly.
Harvesting Your Homegrown Strawberries
Finally, the payoff for all your hard work! Strawberries are ready when they're fully red with no white or green areas remaining. Pick them in the cool morning hours when they're firmest and most flavorful. Gently twist or snip berries off, leaving the green cap attached. Handle them carefully because they bruise easily. Unlike some fruits, strawberries don't continue ripening after picking, so wait until they're perfect. Check plants every couple of days during peak season because berries ripen quickly. One day they're almost ready, the next they're past their prime! Use or refrigerate berries immediately for best quality. They'll keep about three to five days in the fridge. Don't wash them until right before eating, as moisture encourages mold. Freeze extras by spreading them on a baking sheet, freezing solid, then transferring to freezer bags. This keeps berries from clumping into one giant frozen mass. Fresh strawberry shortcake, jam, smoothies, or just eating them straight from the garden are all excellent options!
Tips for Success
Let's wrap up with some insider tricks that'll make your strawberry growing adventure even better. Start with quality seeds from reputable suppliers. Cheap seeds often mean poor germination rates and weak plants. Label everything! Seriously, you won't remember which variety is which six months from now. Keep a garden journal noting planting dates, weather conditions, and what worked or didn't. This information becomes invaluable over time. Don't get discouraged if your first year's harvest is modest. Strawberry plants really hit their stride in their second and third years. Consider succession planting by starting new seeds every few weeks for continuous harvests. Join online gardening communities where you can ask questions and share experiences with fellow strawberry enthusiasts. They're incredibly supportive and full of creative solutions to common problems. Experiment with different varieties until you find your favorites. What grows well for your neighbor might struggle in your specific microclimate. Most importantly, enjoy the process! Gardening should be fun, not stressful.
Conclusion
Learning how to plant strawberry seeds transforms you from a casual gardener into someone who truly understands the complete growing cycle. Sure, it requires patience and attention to detail, but the rewards go far beyond just the fruit. You'll gain confidence, knowledge, and a deeper connection to your food. Those first berries you harvest from seeds you planted will taste sweeter than anything you've ever bought. The skills you develop apply to countless other plants too, making you a more versatile gardener overall. So don't hesitate to start this journey. Grab some seeds, follow these simple steps, and before you know it, you'll be sharing fresh strawberries with friends and family. Happy planting!
Read next: How to Plant Strawberries for a Sweet Harvest
Frequently Asked Questions
Q1: How long does it take for strawberry seeds to germinate?
A: Strawberry seeds typically germinate within one to six weeks under proper conditions.
Q2: Can I plant strawberry seeds directly in the garden?
A: Starting seeds indoors is better because outdoor conditions are harder to control effectively.
Q3: Do strawberry plants produce fruit the first year from seeds?
A: Some may produce lightly, but peak production usually begins in the second year.
Q4: How many strawberry seeds should I plant per container?
A: Plant three to five seeds per small container, then thin to the strongest seedling.
Q5: What temperature is best for germinating strawberry seeds?
A: Strawberry seeds germinate best at temperatures between 65 and 75 degrees Fahrenheit consistently.