How to Plant a Potato That Has Sprouted Easily
Learn how to plant a potato that has sprouted easily with simple steps for growing delicious homegrown potatoes from kitchen scraps.
So you've opened your pantry and discovered that bag of potatoes you forgot about has started sprouting. Those little white or purple nubs are poking out everywhere, and your first instinct might be to toss them in the trash. But hold on just a minute! Those sprouted potatoes are actually nature's way of handing you free seed potatoes, ready and eager to grow into a whole new crop.
Planting sprouted potatoes is one of the easiest and most rewarding gardening projects you can tackle, whether you're a seasoned green thumb or someone who's never dug in the dirt before. There's something incredibly satisfying about transforming what seems like kitchen waste into pounds of fresh, homegrown potatoes. And honestly, once you've tasted potatoes you've grown yourself, store-bought ones just don't compare.
This guide on How to Plant a Potato That Has Sprouted Easily will walk you through every step of the process, from preparing your sprouted spuds to harvesting your bounty. We'll cover the best timing, soil requirements, planting techniques, and all the little tips and tricks that make the difference between a mediocre harvest and an abundant one. Ready to get your hands dirty? Let's dig in!
Why Sprouted Potatoes Are Perfect for Planting
Before we jump into the how-to, let's talk about why those forgotten potatoes are actually gardening gold. When a potato sprouts, it's telling you something important: it's alive and ready to reproduce. Those sprouts, called "eyes" or "chits," contain everything needed to grow a brand new potato plant.
The Science Behind Potato Sprouting
Potatoes are tubers, which means they're essentially underground stems designed to store energy and produce new plants. When conditions are right, specifically when it's warm and there's some humidity, potatoes break dormancy and start sending out shoots. Each eye on a potato can potentially become a new plant, which is why a single sprouted potato can yield multiple plants if you play your cards right.
The sprouts you see are the beginnings of stems that will eventually push through the soil surface, develop leaves, and start photosynthesizing. Meanwhile, underground, new potatoes will form along the buried portions of these stems. It's a pretty elegant system when you think about it.
Not All Sprouted Potatoes Are Created Equal
Here's something worth knowing: while any sprouted potato can technically be planted, not all will give you the best results. Grocery store potatoes are often treated with sprout inhibitors to extend shelf life, which can affect their vigor when planted. They might still grow, but organic potatoes or those from farmers markets tend to perform better because they haven't been chemically treated.
Also, pay attention to the potato's overall condition. A firm potato with healthy-looking sprouts is ideal. If your potato is soft, wrinkled, or has a funky smell, it's probably past its prime for planting. Those ones really should hit the compost bin.
Getting Your Sprouted Potatoes Ready for Planting
Alright, you've got your sprouted potatoes and you're ready to roll. But before you head outside with a shovel, there's some prep work that'll set you up for success.
Selecting the Best Candidates
Take a good look at your sprouted potatoes and choose the healthiest specimens. You want firm potatoes with sprouts that are sturdy and between half an inch to two inches long. Sprouts that are super long and spindly, usually white or pale because they grew in darkness, are weaker than shorter, stockier ones that developed in light.
If your sprouts are looking a bit leggy, you can actually encourage them to beef up by placing the potatoes in a spot with indirect sunlight for a week or two. This process, called chitting, helps the sprouts turn green and grow stronger before planting. It's not strictly necessary, but it can give your plants a head start.
To Cut or Not to Cut
Here's where things get interesting. If your potato is on the larger side, say bigger than a tennis ball, you can cut it into pieces to get more plants. Each piece needs at least one or two eyes, and ideally should be about the size of an egg. Cutting potatoes multiplies your planting material, which is pretty handy if you're working with limited stock.
After cutting, let the pieces sit in a cool, dry place for a day or two. This allows the cut surfaces to form a protective callus that helps prevent rot once planted. Some gardeners dust the cuts with sulfur or wood ash for extra protection, but honestly, the callusing process usually does the trick on its own.
Smaller potatoes, those roughly egg-sized already, can go straight into the ground without cutting. Sometimes the simplest approach is the best one.
How to Plant a Potato That Has Sprouted Easily: Step by Step
Now we're getting to the good stuff. Following these steps will help ensure your sprouted potatoes transform into thriving plants loaded with tasty tubers.
Choosing Your Planting Location
Potatoes love sunshine, so pick a spot that gets at least six to eight hours of direct sunlight daily. They're not too picky about perfect conditions, but they definitely perform best with plenty of light.
Good drainage is essential because potatoes sitting in waterlogged soil will rot faster than you can say "blight." If your garden tends to stay soggy, consider raised beds or containers instead. Speaking of which, potatoes grow wonderfully in containers, grow bags, or even old buckets with drainage holes drilled in the bottom.
Rotate your planting location each year if possible. Potatoes are susceptible to soil-borne diseases that can build up over time, so moving them around helps break disease cycles. Avoid spots where you grew tomatoes, peppers, or eggplants recently since they're all in the same family and share similar pest and disease issues.
Preparing the Soil
Potatoes thrive in loose, well-draining soil that's rich in organic matter. If your soil is heavy clay, work in some compost, aged manure, or other organic amendments to improve its texture. Sandy soils drain well but might need extra organic matter to hold nutrients and moisture.
The ideal soil pH for potatoes falls between 5.0 and 6.5, which is slightly acidic. Most garden soils fall somewhere in this range naturally, but if you've had issues growing potatoes before, a soil test might reveal whether pH adjustment is needed.
Dig or till the planting area to loosen the soil about eight to twelve inches deep. This makes it easier for the developing tubers to expand and simplifies harvesting later on. Remove any rocks, sticks, or debris you encounter while working the soil.
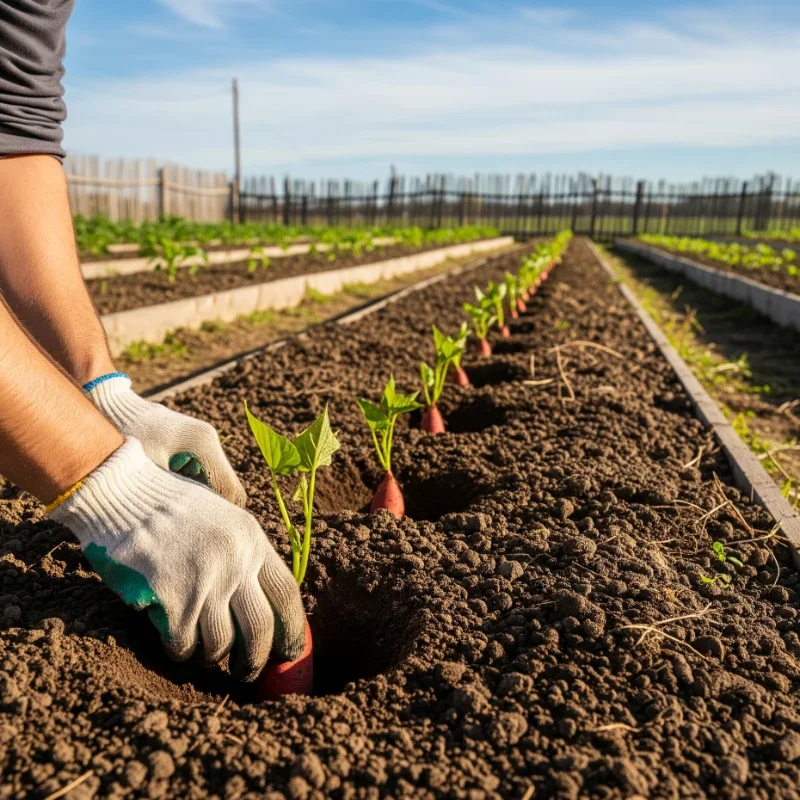
Planting Depth and Spacing
Here's where the rubber meets the road. Dig a trench or individual holes about four inches deep. Place your sprouted potatoes or potato pieces with the eyes facing upward, spacing them about twelve inches apart within the row. If you're planting multiple rows, keep them about two to three feet apart to allow room for hilling later.
Cover the potatoes with about three to four inches of soil initially. Don't fill the trench completely yet because you'll be adding more soil as the plants grow. This technique, called hilling, encourages more tubers to form along the buried stems.
Some folks prefer the no-trench method, where you simply lay potatoes on the soil surface and cover them with a thick layer of straw or mulch. This approach works surprisingly well and makes harvesting a breeze since you just pull back the mulch to find your potatoes.
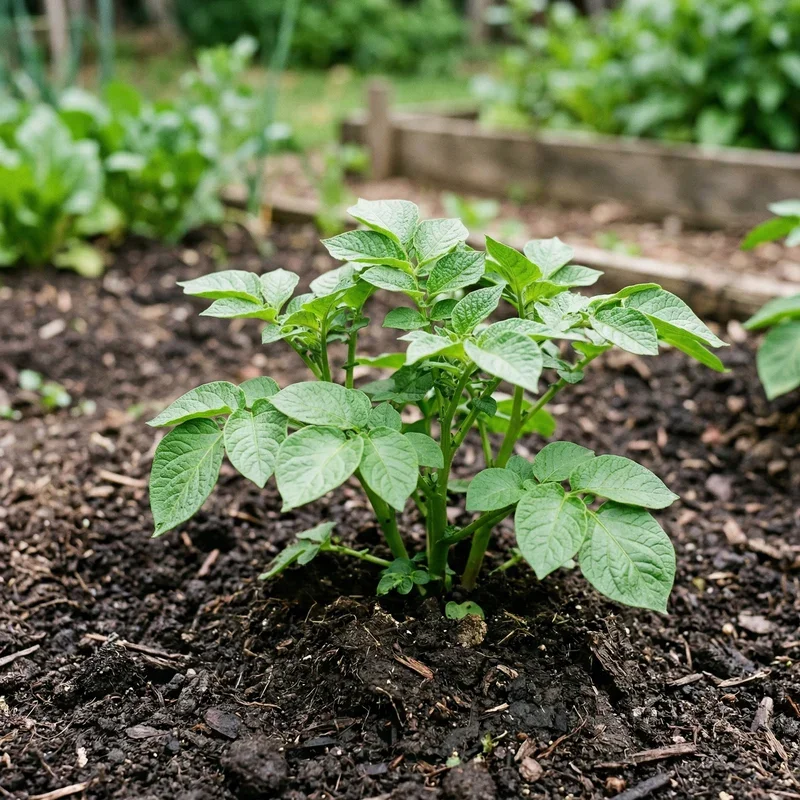
The Hilling Process Explained
About two weeks after planting, you should see green shoots poking through the soil surface. Once these shoots are about six to eight inches tall, it's time to hill. Pull soil up around the stems, leaving just a few inches of foliage exposed. You can also use straw, leaves, or grass clippings for this purpose.
Repeat the hilling process every few weeks as the plants continue growing. This accomplishes several things: it prevents developing tubers from being exposed to light, which turns them green and toxic; it encourages more tuber formation along the buried stems; and it helps keep weeds in check.
By the time you're done hilling, your plants might be sitting on mounds a foot or more tall. It looks a bit dramatic, but trust the process because it works.
Caring for Your Growing Potato Plants
Planting is just the beginning. Proper care throughout the growing season determines whether you'll harvest a handful of marble-sized spuds or buckets full of gorgeous potatoes.
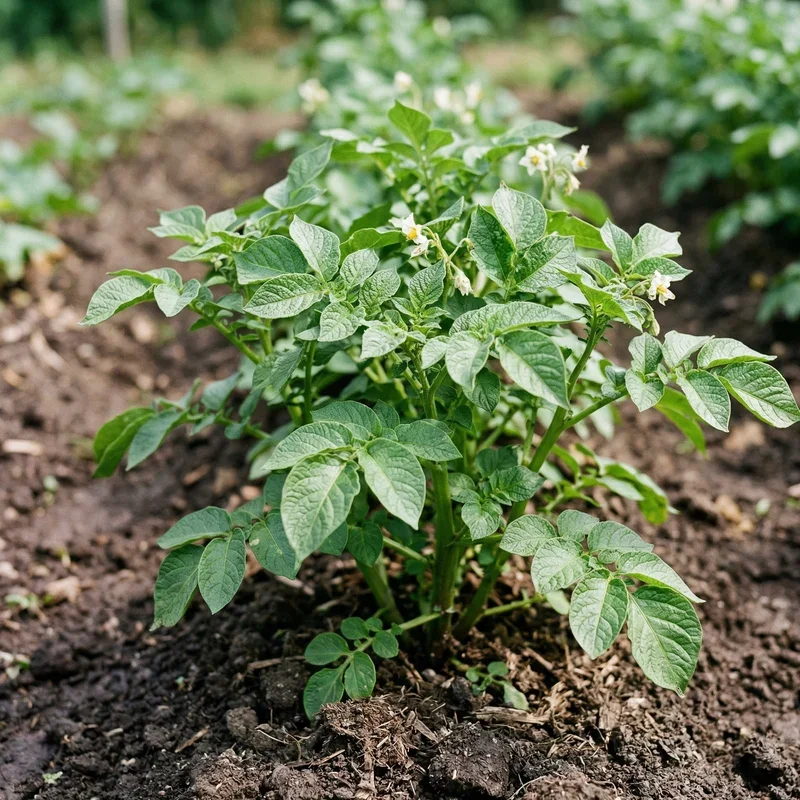
Watering Requirements
Potatoes need consistent moisture, especially once they start flowering, which signals that tuber formation is in full swing. Aim for about one to two inches of water per week, whether from rainfall or irrigation. Inconsistent watering can cause problems like knobby potatoes or hollow heart.
That said, don't go overboard. Soggy soil promotes rot and disease. The goal is evenly moist soil, not muddy conditions. Mulching around plants helps retain soil moisture and reduces the frequency of watering needed.
Morning watering is preferable because it gives foliage time to dry before evening. Wet leaves overnight create ideal conditions for fungal diseases like late blight, which you definitely want to avoid.
Fertilizing for Success
Potatoes are moderate feeders, meaning they appreciate nutrients but don't need constant fertilization. If you worked compost or aged manure into the soil before planting, your plants might not need much additional feeding.
For those using fertilizer, a balanced option or one slightly higher in phosphorus and potassium works well. Avoid high-nitrogen fertilizers, which encourage lush foliage at the expense of tuber development. Nobody wants beautiful plants with tiny potatoes underground.
Side-dress with compost or a light fertilizer application when you hill the plants, about three to four weeks after planting. This gives plants a nutritional boost right when they're gearing up for serious tuber production.
Dealing with Pests and Diseases
Colorado potato beetles are probably the most notorious potato pest. These striped insects and their red larvae can defoliate plants quickly if left unchecked. Hand-picking works for small infestations, while organic options like neem oil or spinosad help with larger populations.
Aphids, flea beetles, and wireworms can also cause trouble. Healthy plants growing in good soil resist pest damage better than stressed ones, so proper care is your first line of defense.
Late blight, the disease responsible for the Irish Potato Famine, remains a serious concern. It spreads rapidly in cool, wet conditions and can destroy an entire crop within days. Watch for dark spots on leaves and remove affected foliage immediately. Fungicide applications help prevent spread in areas where blight is common.
Crop rotation, good air circulation, and avoiding overhead watering all reduce disease pressure. Prevention really is easier than treatment when it comes to potato diseases.
Knowing When and How to Harvest
Patience is tough when you're excited about homegrown potatoes, but timing your harvest correctly ensures the best quality spuds.
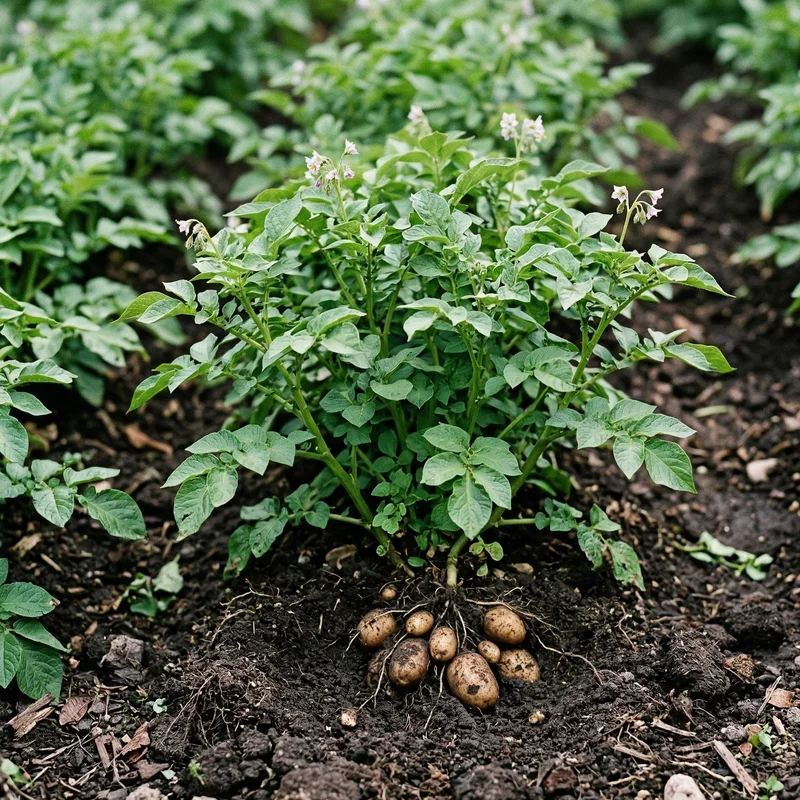
Signs Your Potatoes Are Ready
For new potatoes, those small, tender ones with thin skins, you can start harvesting as soon as plants flower. Just reach into the soil near a plant and feel around for small tubers. Take what you need and leave the rest to keep growing.
For mature potatoes intended for storage, wait until the foliage dies back and turns yellow or brown, usually two to three weeks after flowering ends. This signals that the plant has finished transferring energy to the tubers, and their skins have toughened up for storage.
Harvesting Techniques
Choose a dry day for harvesting since wet potatoes are more prone to rot in storage. Use a garden fork rather than a shovel, working from the outside of the plant inward to avoid accidentally stabbing your precious tubers. Insert the fork about a foot away from the stem and gently lift the soil, revealing potatoes as you go.
If you planted using the straw mulch method, harvesting is even easier. Just pull back the mulch and pick up your potatoes. It's almost like an Easter egg hunt, except way more delicious.
Handle potatoes gently during harvest because bruised tubers don't store well. Let them cure in a cool, dark place with good air circulation for about two weeks before long-term storage. This allows the skins to fully toughen and small wounds to heal.
Troubleshooting Common Problems
Even experienced gardeners encounter hiccups sometimes. Here's how to handle some common issues that pop up when growing potatoes from sprouts.
Green Potatoes
If your potatoes turn green, it means they were exposed to light during growth. The green color indicates chlorophyll production and, more importantly, the presence of solanine, a toxic compound. Cut away any green portions before eating, or better yet, save green potatoes for planting next season.
Proper hilling prevents this problem by keeping developing tubers covered and protected from light exposure.
Small Harvest
Disappointing yields usually result from one of a few causes: not enough water during tuber formation, excessive nitrogen fertilizer, or harvesting too early. Overcrowding can also limit tuber size since plants compete for resources when spaced too closely.
Rotting Potatoes
Rot typically indicates either overwatering, poor drainage, or planting in infected soil. Ensure good drainage and avoid watering excessively. Rotating crops and using healthy seed potatoes reduces disease issues.
Conclusion
Learning How to Plant a Potato That Has Sprouted Easily transforms what seems like kitchen waste into a rewarding gardening adventure. Those forgotten spuds hiding in your pantry are genuinely valuable planting material just waiting for a chance to shine. With proper preparation, good soil, consistent care, and patience through the growing season, you'll harvest potatoes that taste infinitely better than anything from the grocery store. This How to Plant a Potato That Has Sprouted Easily guide gives you everything needed to succeed, so grab those sprouted potatoes and start planting!
Read next: How to Plant Sweet Potatoes in Your Garden
Frequently Asked Questions
1.Can I plant potatoes that have very long sprouts?
Yes, but shorter sturdy sprouts perform better since long pale sprouts are weaker.
2.How long does it take for sprouted potatoes to produce a harvest?
Most potato varieties mature in seventy to one hundred twenty days after planting.
3.Do I need to buy special seed potatoes or can I use grocery store ones?
Grocery potatoes work but untreated organic ones or certified seed potatoes perform better.
4.Can I grow potatoes in containers on my balcony?
Absolutely, potatoes thrive in containers, grow bags, or buckets with proper drainage holes.
5.What happens if I plant potatoes in shady areas?
Plants will grow but produce fewer and smaller tubers due to insufficient sunlight.