How to Build a DIY Garden Arch Trellis Step by Step
Learn to build a stunning DIY garden arch trellis with our complete step-by-step guide. Perfect for climbing plants and garden beauty.

Well hello there, fellow garden enthusiast! Are you ready to add some serious wow factor to your outdoor space? There's something absolutely magical about a garden arch trellis that just makes your heart skip a beat. Whether you're dreaming of climbing roses cascading overhead or sweet peas creating a fragrant tunnel, building your own arch trellis is easier than you might think!
You know what they say – good things come to those who build them themselves. And boy, is that true when it comes to garden structures! Not only will you save a pretty penny compared to buying a fancy pre-made version, but you'll also get that incredible satisfaction that comes from creating something beautiful with your own two hands.
This comprehensive guide will walk you through everything you need to know about constructing a sturdy, gorgeous garden arch that'll be the envy of the neighborhood. From selecting the right materials to putting on those finishing touches, we've got you covered. So grab your tool belt and let's dive into this exciting project together!
Planning Your Garden Arch Trellis Project
Choosing the Perfect Location
First things first – let's talk about location, location, location! Your garden arch needs to be positioned just right to make the biggest impact. Think about where people naturally walk in your garden. An arch works beautifully as an entrance to a specific garden area, marking the transition from one space to another.
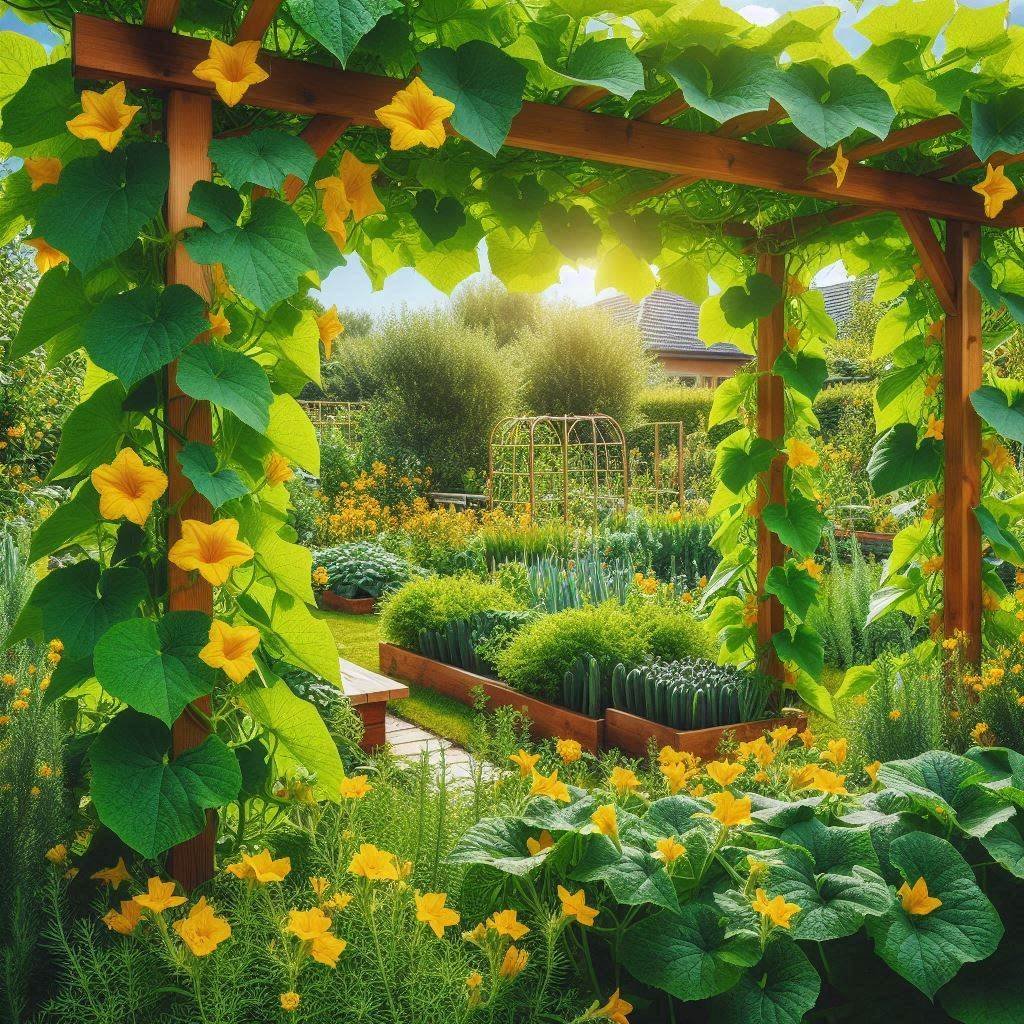
Consider the mature size of whatever plants you're planning to grow on your trellis too. Some climbing plants can get absolutely massive, so you'll want to make sure there's plenty of room for growth. Also, think about sun exposure – most flowering vines prefer at least six hours of direct sunlight daily.
Don't forget about practical considerations either. You'll need easy access for maintenance and watering, and the location should complement your existing landscape design rather than competing with it.
Determining Size and Style
Size matters when it comes to garden arches, but bigger isn't always better. A good rule of thumb is to make your arch at least eight feet tall and six feet wide. This gives you plenty of headroom even when plants start filling in the structure.
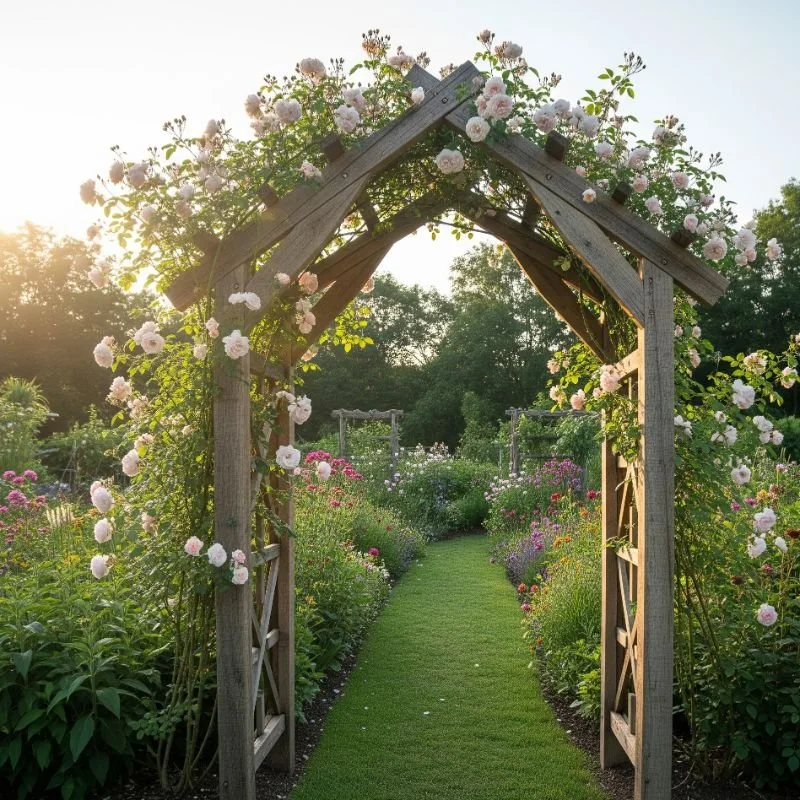
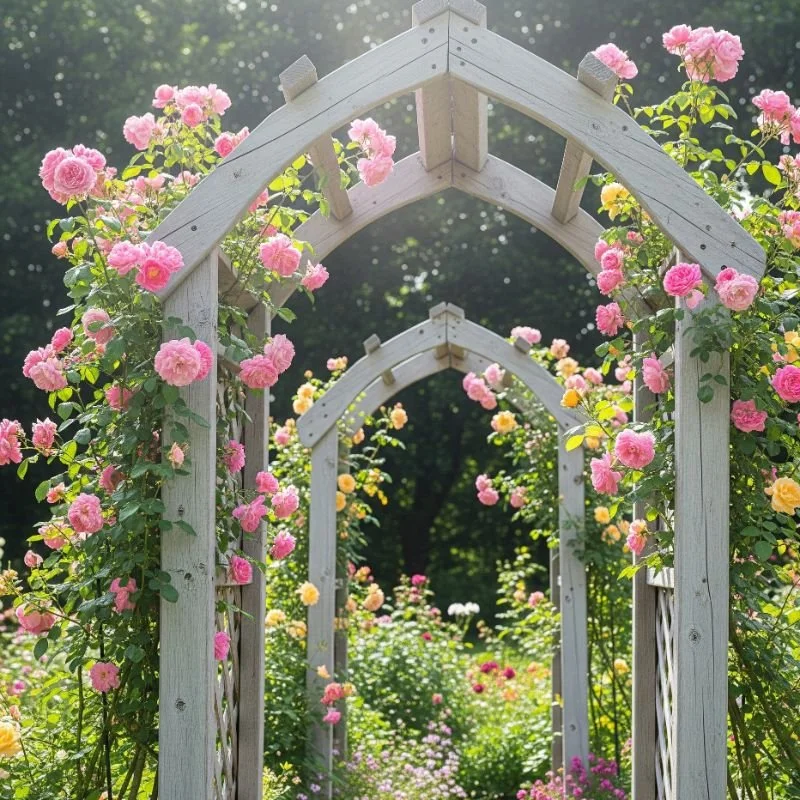
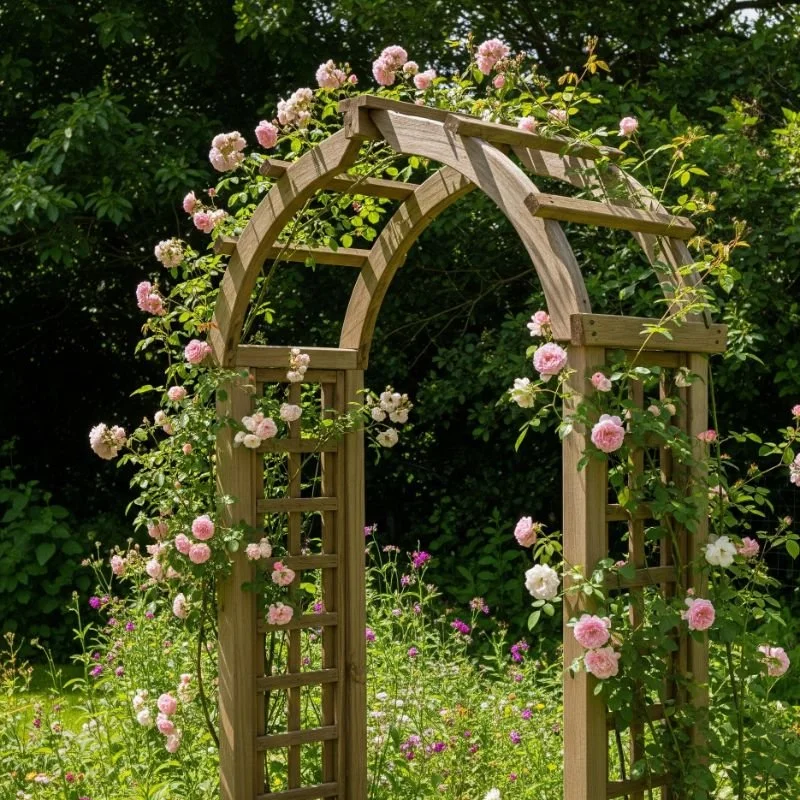
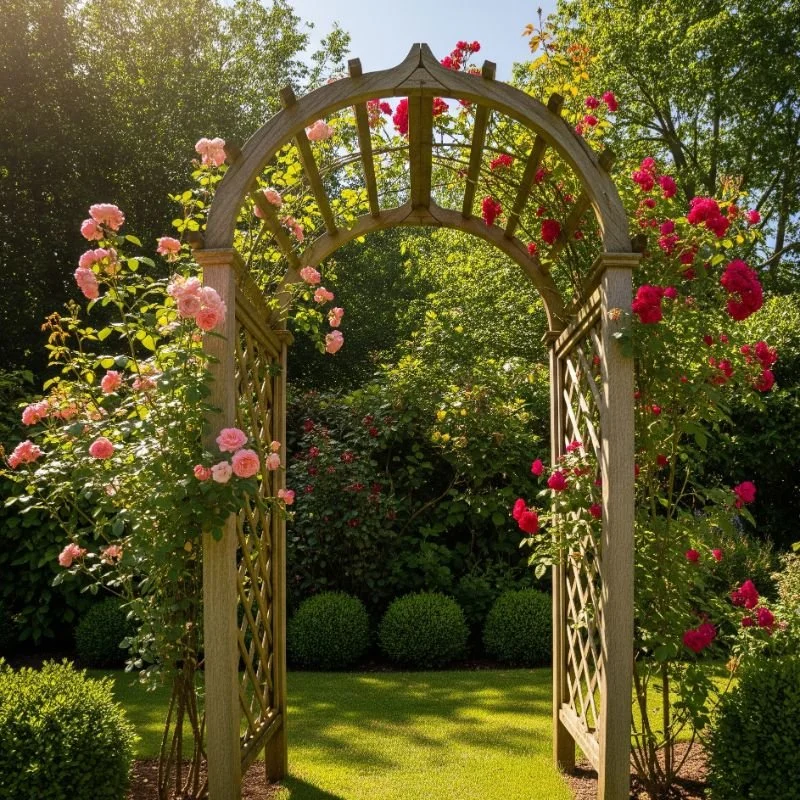
As for style, well that's where your personality really gets to shine! Traditional arched tops are classic and timeless, but square-topped designs have a more contemporary feel. Gothic-style pointed arches add drama and elegance, while rustic styles using natural branches create a whimsical cottage garden vibe.
Think about your home's architecture and existing garden features. You want your new arch to feel like it belongs, not like it landed from outer space!
Essential Materials and Tools
Wood Selection for Long-Lasting Results
When it comes to wood choices, you've got several fantastic options. Cedar is the gold standard for outdoor projects because it's naturally rot-resistant and weathers beautifully. Sure, it costs a bit more upfront, but it'll save you headaches down the road.
Pressure-treated pine is another solid choice that won't break the bank. Just make sure you're getting quality lumber that's rated for ground contact if any parts will be buried. Redwood is gorgeous but can be pricey, while untreated pine is budget-friendly but will need regular maintenance to prevent rot.
Whatever wood you choose, avoid anything with large knots or warping. You want straight, strong pieces that'll hold up to wind, weather, and the weight of mature climbing plants.
Hardware and Fasteners
Let's talk about the nuts and bolts of this project – literally! Galvanized or stainless steel hardware is absolutely essential for outdoor projects. Regular steel will rust faster than you can say "garden arch," leaving you with unsightly stains and weakened connections.
Carriage bolts are perfect for major connections because they create strong, clean-looking joints. Deck screws work great for attaching smaller pieces, and don't forget about corner brackets if you want extra reinforcement. Weather-resistant wood glue can add extra strength to your joints too.
Oh, and here's a pro tip – buy about 20% more fasteners than you think you'll need. There's nothing worse than being one screw short when you're in the middle of assembly!
Tools You'll Actually Need
Don't worry – you won't need a fancy workshop to tackle this project. A circular saw or miter saw will make quick work of cutting your lumber to size. If you don't own one, most lumber yards will cut pieces for you for a small fee.
A drill is absolutely essential for making pilot holes and driving screws. Get yourself a good set of bits including both drilling and driving bits. A level will keep everything straight and true, while a measuring tape and pencil are must-haves for marking cuts and positions.
Clamps are incredibly helpful for holding pieces together while you work, and a socket wrench set will make tightening bolts much easier. Don't forget safety gear either – safety glasses and work gloves should be non-negotiable!
Step-by-Step Construction Guide for How to Build a DIY Garden Arch Trellis
Preparing the Foundation
Alright, let's get this party started! The foundation of your arch is crucial for long-term stability. Start by marking out where your posts will go using spray paint or stakes and string. Make sure everything is square by measuring diagonally – the measurements should be equal if you've got it right.
Dig holes for your posts about 18 to 24 inches deep, depending on your soil conditions. Clay soil can get away with shallower holes, while sandy soil needs deeper anchoring. Make each hole about twice as wide as your post for easier positioning and backfilling.
If you're dealing with really soft soil or want extra stability, consider setting your posts in concrete. Mix up some quick-set concrete according to the package directions and you'll have rock-solid anchoring that'll last for decades.
Building the Frame Structure
Now comes the fun part – actually building your arch! Start by cutting all your pieces to size according to your plans. Take your time with measurements because you know what they say – measure twice, cut once!
Begin with the side frames, assembling them on a flat surface before installation. This is where those clamps really come in handy for holding everything in position while you drill pilot holes and drive your screws. Working with a helper makes this process much smoother, so don't be shy about asking for assistance.
Once your side frames are complete, it's time to install them in your prepared holes. Use temporary braces to hold them plumb while you backfill and compact the soil around the posts. Double-check that everything is level and square before moving on to the top section.
Creating the Arch Top
Here's where your arch really starts taking shape! The curved top section is what gives your trellis that classic, elegant look. If you're going for a traditional arch, you'll need to create a template for cutting your curve.
A simple way to create a smooth arch is to use a long, flexible strip of wood or even a piece of rope to mark your curve. Adjust it until you get the shape you want, then trace it onto your lumber before cutting.
Take your time with this step – a wonky arch top will be obvious from a mile away! Sand the cut edges smooth to prevent splinters and ensure your climbing plants won't get damaged as they grow.
Installing Cross Supports and Trellis Elements
The trellis portion of your arch is where climbing plants will really grab hold and take off. Horizontal slats spaced about 6 to 8 inches apart work great for most climbing plants. You can also create a grid pattern using both horizontal and vertical pieces for a more traditional look.
Don't make the spacing too tight though – you want good air circulation to prevent disease problems in your plants. Plus, overly dense trellis work can look cluttered rather than elegant.
Consider the mature size of your chosen climbing plants when deciding on spacing. Delicate annual vines need closer supports, while vigorous perennial climbers can span larger gaps with ease.
Finishing Touches and Customization
Sanding and Surface Preparation
Nobody wants splinters in their garden paradise! Give your entire arch a thorough sanding with medium-grit sandpaper, paying special attention to cut edges and any rough spots. This step not only improves appearance but also helps stains and finishes penetrate evenly.
Wipe down all surfaces with a tack cloth or clean rag to remove sanding dust before applying any finishes. Trust me, skipping this step will leave you with a blotchy, unprofessional-looking result.
Round over sharp edges slightly with sandpaper – this gives your arch a more polished, finished appearance and makes it safer to work around as you maintain your climbing plants.
Staining and Weather Protection Options
Here's where you can really make your arch pop! A good-quality exterior stain will not only protect your wood but also enhance its natural beauty. Semi-transparent stains show off the wood grain while providing excellent protection, while solid stains offer more color options but hide the natural wood character.
If you chose cedar or redwood, you might want to let it weather naturally to that beautiful silvery-gray color. Just keep in mind that unstained wood will need more frequent maintenance to prevent splitting and checking.
Whatever finish you choose, make sure it's specifically designed for exterior use and follow the manufacturer's application instructions to the letter. Two thin coats usually work better than one thick coat.
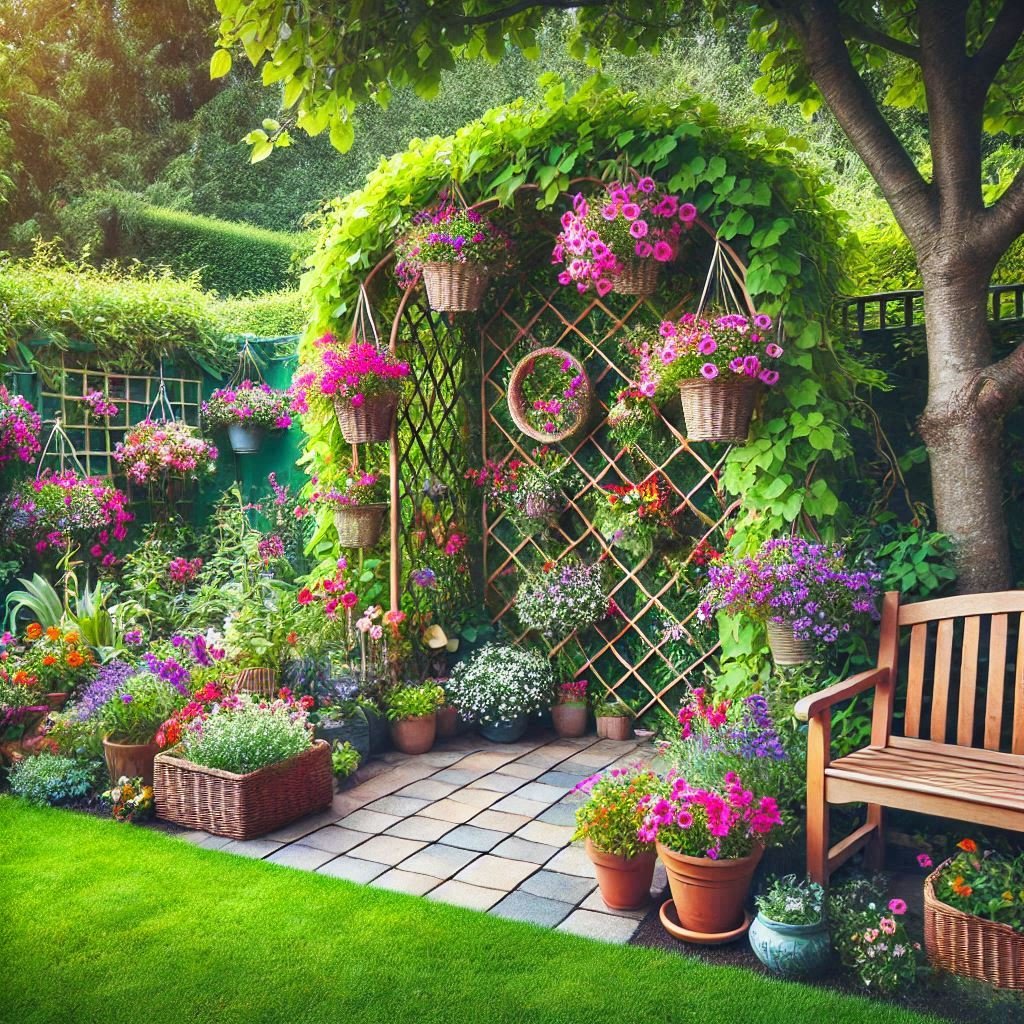
Adding Decorative Elements
This is where you can let your creativity run wild! Decorative brackets at the corners add a Victorian touch, while simple metal hardware gives a more industrial modern look. Wood finials on top of the posts create elegant focal points, and carved details can make your arch truly one-of-a-kind.
Consider adding small shelves or hooks for hanging plants or garden tools. Solar lights integrated into the structure can provide beautiful evening illumination and extend your garden enjoyment into the night hours.
Just remember that less is often more when it comes to decorative elements. You want to enhance the arch's natural beauty, not overwhelm it with too many competing details.
Plant Selection and Training Techniques
Best Climbing Plants for Arch Trellises
Choosing the right plants for your new arch is almost as important as building it properly! Climbing roses are classic choices that provide stunning blooms and often delightful fragrance. Varieties like 'Eden,' 'New Dawn,' or 'Climbing Iceberg' are reliable performers in most climates.
For annual color, morning glories, sweet peas, and cardinal climber create spectacular displays. These fast-growing vines will cover your arch quickly but need replanting each year. Perennial options like clematis, honeysuckle, and climbing hydrangea provide long-term beauty with less annual work.
Consider bloom times too – you can create a succession of flowers by combining early, mid-season, and late bloomers. This keeps your arch looking fabulous from spring through fall!
Training and Support Methods
Getting your climbing plants off to a good start is crucial for long-term success. Young plants often need a little help finding their way onto the trellis structure. Soft plant ties or twine work great for gently guiding stems without cutting into tender growth.
Check your plants regularly during the growing season and guide new growth where you want it to go. It's much easier to train flexible young stems than to try redirecting thick, woody growth later on.
Some plants climb by twining, others use tendrils, and some need to be tied up manually. Understanding how your chosen plants naturally climb will help you provide the right kind of support for healthy, vigorous growth.
Maintenance and Seasonal Care
Annual Inspection and Repairs
Just like any outdoor structure, your garden arch will need some TLC to keep it looking and performing its best. Plan on doing a thorough inspection each spring before plants start their major growth spurt. Look for loose fasteners, weathered finishes, or any signs of insect damage.
Tighten any loose bolts or screws, and replace any damaged hardware before it becomes a bigger problem. A little preventive maintenance goes a long way toward extending the life of your arch.
Don't forget to check the soil around the base of your posts too. Settling or erosion can compromise stability, so add soil or mulch as needed to maintain proper support.
Plant Pruning and Training
Regular pruning keeps your climbing plants healthy and your arch looking tidy. Most flowering vines benefit from annual pruning to remove dead wood and encourage new growth. The timing depends on when your plants bloom – generally, prune spring bloomers right after flowering, and summer bloomers in late winter or early spring.
Be gentle when working around your arch structure. Plants can grow surprisingly tightly around supports, so take your time to avoid damaging either the plant or the trellis when pruning or training.
Keep an eye out for overly vigorous growth that might overwhelm your arch. Some plants can literally grow themselves to death if not kept in check!
Advanced Tips for How to Build a DIY Garden Arch Trellis Step by Step
Professional-Grade Construction Techniques
Want to take your arch to the next level? Consider using mortise and tenon joinery for an incredibly strong, traditional look. This technique takes more time and skill but creates joints that can last for generations.
Adding metal reinforcement plates at stress points can dramatically increase your arch's load-bearing capacity. This is especially important if you're planning to grow heavy vines or live in an area with strong winds.
Pre-drilling all screw holes prevents splitting and creates cleaner-looking joints. It's an extra step that's absolutely worth the effort, especially when working with hardwoods or near the ends of boards.
Creative Design Variations
Why settle for ordinary when you can create something extraordinary? Consider building a double arch with connecting overhead beams for a tunnel effect. This creates a truly dramatic garden feature that's perfect for longer pathways.
Asymmetrical designs can add modern flair to traditional gardens, while incorporating recycled materials like old windows or doors creates unique focal points with character and history.
Think about seasonal decorations too – your arch can serve as a framework for holiday lights, seasonal banners, or changing plant displays throughout the year.
Cost Breakdown and Budget Considerations
Material Costs and Money-Saving Tips
Building your own arch trellis typically costs 60 to 70% less than buying a comparable ready-made structure. A basic cedar arch can be built for around $150 to $200 in materials, while a premium version with decorative elements might run $300 to $400.
Shopping end-of-season sales at lumber yards can save you significant money on materials. Many stores also offer discounts on bulk purchases, so consider coordinating with neighbors on larger orders.
Don't overlook salvage yards and classified ads for reclaimed lumber. Old barn wood or deck boards can create stunning rustic arches at a fraction of new lumber costs.
Time Investment and Project Scheduling
Plan on spending a full weekend for this project if you're working alone, or a long Saturday with help. Breaking the work into phases makes it more manageable – foundation prep one day, assembly the next, and finishing work when weather permits.
Consider seasonal timing too. Spring and fall are ideal for construction since you won't be fighting extreme heat, and plants installed in these seasons establish better than summer plantings.
Don't rush the process. Taking your time results in better quality construction and a more enjoyable building experience. After all, this arch should last for many years!
Conclusion
There you have it – everything you need to know about How to Build a DIY Garden Arch Trellis Step by Step! Building your own arch trellis isn't just about saving money (though that's certainly nice). It's about creating something uniquely yours that'll bring joy for years to come. From the satisfaction of completing the build to watching your chosen plants transform the structure into a living piece of art, this project delivers rewards that keep on giving. Take your time, follow safety practices, and don't be afraid to put your own creative spin on the design.
Read next: 15 DIY Garden Trellis Ideas for Lush Vines
Frequently Asked Questions
Q1: How long does it take to build a garden arch trellis?
A: Most DIY builders complete a basic arch in one to two weekends.
Q2: What's the best wood for outdoor garden arches?
A: Cedar offers the best rot resistance, while pressure-treated pine provides good value.
Q3: How deep should I dig holes for arch posts?
A: Dig holes 18 to 24 inches deep for proper stability and support.
Q4: Can I build an arch without concrete footings?
A: Yes, but concrete provides superior stability, especially in soft or sandy soils.
Q5: What tools do I absolutely need for this project?
A: Essential tools include saw, drill, level, measuring tape, and basic hand tools.